A photographer’s portfolio is a collection of his or her works, presented digitally or in print. Basically, it represents your photographic focus or the type of work you want to create in the future. As a result, a portfolio can be used to showcase your work as well as demonstrate your talent and area(s) of expertise to your market or audience. Many photographers create multiple portfolios, each suited to a different market or goal. You’ll need a photography portfolio to take your photography business to the next level. There are many elements that go into creating a photography portfolio. So take your time and carefully consider every detail of your portfolio, from the photos you choose to the way you present them.
Portfolios are divided into Photography Portfolio, Brand Book and Cinematography Portfolio.
Types of Photography Portfolio
Photography portfolios can be categorised into two main types: Factual and Non-Factual Photography Portfolios.
Factual Photography Portfolios contain a wide variety of subjects with the objective of capturing truth and presenting subjects in their true form. This category encompasses various genres of photography, such as Travel, Landscape, Architecture, Art and Culture, Street Photography, Portraits, Photojournalism, Sports, and Wildlife, which specifically includes animals, birds, reptiles, and insects.
However, Non-Factual Photography Portfolios feature creative or conceptual photographs. This category includes Advertising, Fashion, Food, Product, and Jewellery photography, with a primary focus on creativity, presentation, and aesthetic appeal rather than only recording the topic as it is.
Each of these portfolios is structured into eight separate segments. Every chapter presents a collection of four carefully selected pictures, thoughtfully chosen to demonstrate the concept and aesthetic of the corresponding portfolio.
Factual Photography
Photojournalism Or Travel Photography
Each chapter can be includes four photos.
- Chapter One – Landscape Photography
- Chapter Two – Architecture Photography
- Chapter Three – Art and Culture
- Chapter Four – Village Experience
- Chapter Five – Portrait Photography
- Chapter Six – Street Photography
Nature & Wildlife Photography
Each chapter can be includes four photos.
- Chapter One – Insects
- Chapter Two – Reptiles
- Chapter Three – Amphibian
- Chapter Four – Birds
- Chapter Five – Animal
Non – Factual Photography
Advertising Photography
Each chapter can be includes four photos.
- Chapter One – Product – Cosmetics
- Chapter Two – Product – Jewelry
- Chapter Three – Product – Electronics
- Chapter Four – Product – Grocery
- Chapter Five – Food – Beverage
- Chapter Six – Food – Traditionally
- Chapter Eight – Fashion -Life Style
Sports & Automotive Photography
Each chapter can be includes four photos.
- Chapter One – Cricket
- Chapter Two – Football
- Chapter Three – Tennis
- Chapter Four – Badminton
- Chapter Five –Athletics
- Chapter Six – Boxing
- Chapter Eight – Any Sports
Content Writing
I. Front Page
a. Title of the book – One Word (14 characters)
b. Byline – Author Name (Full Name)
II. Blank Page
III. Title Page
a. Book Name – Maximum Two words (20 characters)
b. Byline – Author Name (Full Name)
c. Creative Hut Logo – Click here
IV. Copyright Page
a. Content. Click here (Futura MT BT Fonts)
b. Logo – Click here
V. Index Page
a. Write the Title “Table of Content”
b. Page Number
c. Chapter Title
d. Chapter Category
VI. Blank Page
VII. Book Introduction
Anatomy of Portfolio Content Page
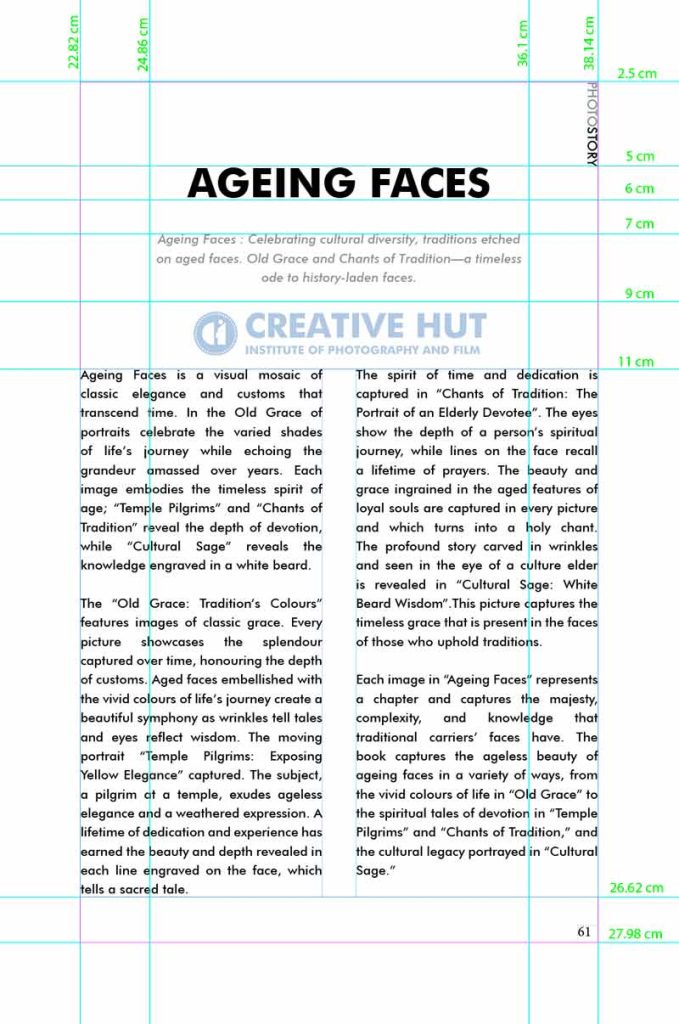
(Explain your title of a book. ie. write the title called “INTRODUCTION”. Content should be in a traditional or Inverted Pyramid way of Writing i.e Introduction, Body and Conclusion.)
a. Heading – INTRODUCTION (Write Introduction)
b. Billboard / Summary / Description
Explain the USP or Essence of your theme – About your book title and how book title can we justify the book. (20 to 25 words | 156 characters including space | 1 or 2 sentences).
c. The Lead / Beginning / Introduction : The most important info
Explain your theme. Approximately 60 – 100 words (One Paragraph – Four or five sentences). The classic who, what, when, where, why, and how of a story. (Five “W” + 1H).
d. The Mid : The crucial info.
Logic, Story, Issue, evidence, details, explanation of a theme. Approximately 300 words. (One or two Paragraph – Five or 10 sentences)
e. The Tail / Conclusion : Extra info.
Interesting / related Chapter and details and concept about following Photos. Approximately 40-60 words. (One Paragraph – Two or Three sentences)
Running Head | PHOTO STORY
Page Number : 01
VIII. Blank Page
IX. Chapter One Content Page
a. Heading of the Chapter
Headline or title tells what the story is about. Maximum One or two words. “Freeze the moment”
b. Billboard / Summary / Description
USP or Essence of your Chapter (20 to 25 words | 156 characters including space | 1 or 2 sentences). Heading can be explained. Explain the meaning of the heading “Freeze the moment”. Write in a italics.
c. The Lead / Beginning / Introduction : The most important info
Explain your chapter heading. Approximately 60 – 100 words (One Paragraph – Four or five sentences). What is “Freeze the moment”?. The classic who, what, when, where, why, and how of a story. (Five “W” + 1H).
d. The Body/ Middle : The crucial info.
Logic, Story, Issue, evidence, details, explanation of a theme. Approximately 300 words. (One or two Paragraph – Five or ten sentences). Support, Dispute, Expand of the topic
e. The Tail / Conclusion : Extra info.
Interesting / related Chapter and details and concept about following Photos. Approximately 40-60 words. (One Paragraph – Two or Three sentences).
Use SEO Keywords in a content.
X. Images – Four Pages
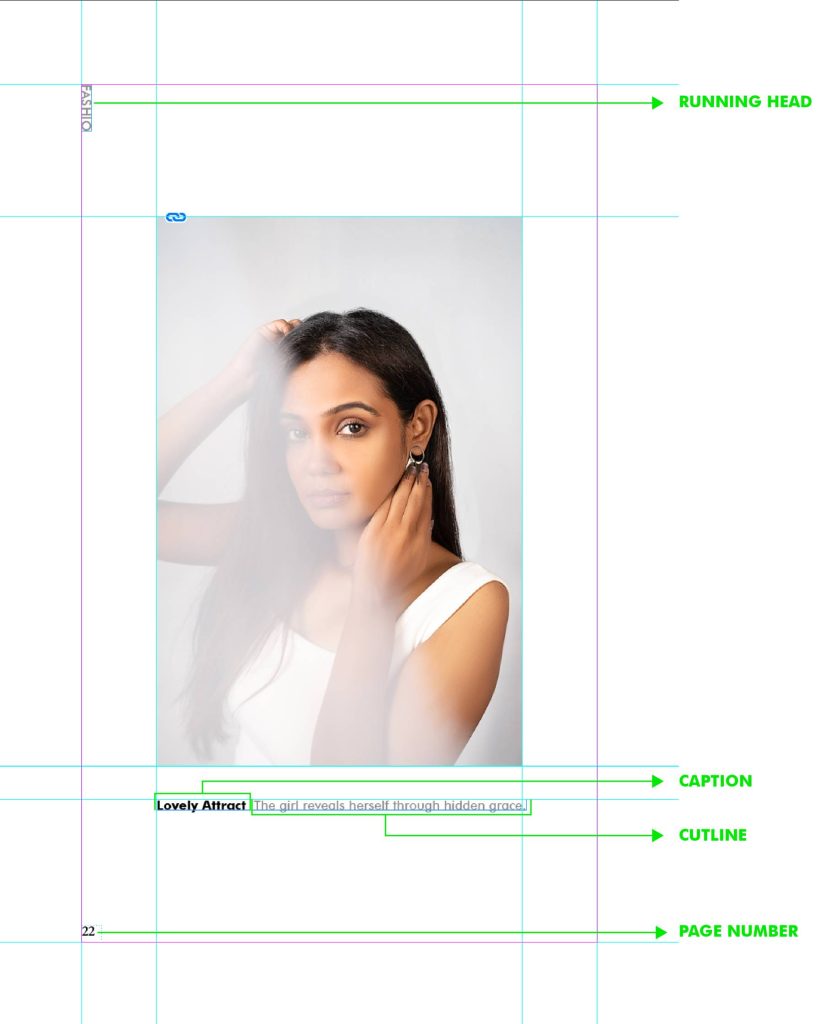
Four images in a chapter.
a. Caption
Caption should not increase more than two or three words. (20 Characters.) Do not begin a caption with names. If your photo includes important people add the person name. A caption is a brief description accompanying a Photograph. The caption can be either
Subject based = Add the Subject – eg. The Old Woman
Light based = Add Adjective. eg. A Generous Look, An Indian village old woman, With a generous look while wandering in the village.
Composition based = Add the Verb. eg. A Wandering Lady
b. Cutline
“cutline” the words describing the photograph. The cutline is a longer phrase or a sentence. describes the photograph, giving context of the image, or relating it to the article. Subject + Describe the image + Place + When. Eg. People rescued by the navy walking out of INS Kochi in Mumbai on Wednesday
XI. Every Chapter after keep a blank page.
Content starts after blank page i.e right side of the page.
XII. Model Release Page.
Keep a signed copy of a model release page (scanned one in a Creative Hut Letter Pad).
XIII. Blank Page
XIV. Back Cover
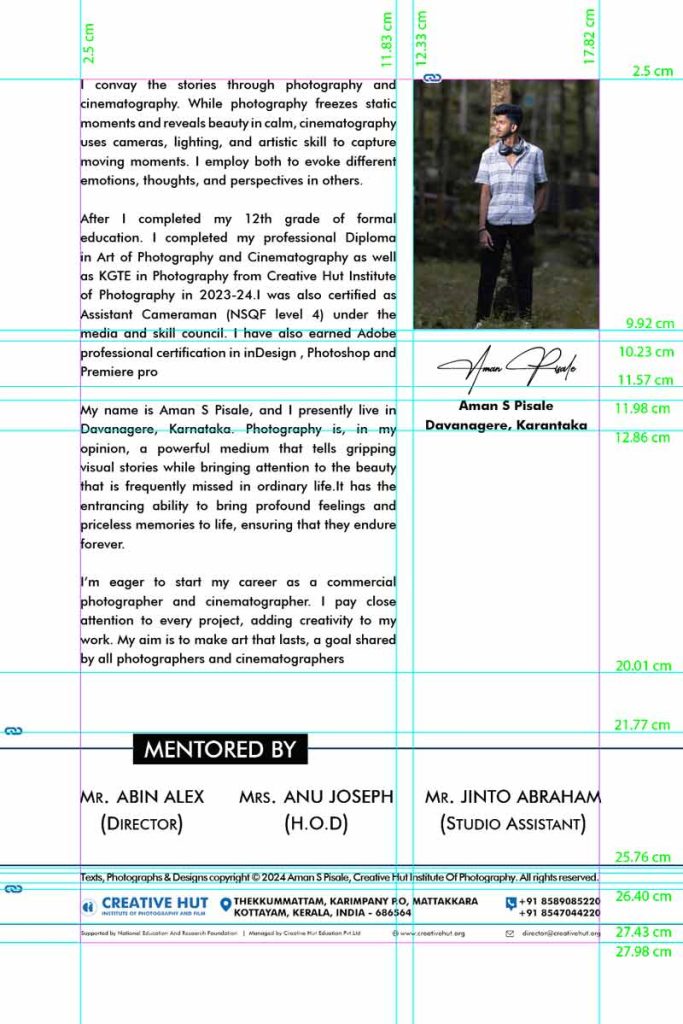
Image of Author
Name and Signature of a Author
About Author. Prepare a Self Introduction
“Tell me about yourself” | Write about yourself – First Person Point of View for Portfolio and Third person point of View for Website Page.
INCLUDES
First Paragraph (Three Sentences)
About Goal | Point of View | Perspective | Inspiration etc
Common sentence / General Thoughts about Photography and Cinematography
For example, A photograph can be both positive and negative. There are no good or bad photographs. The image was understood by the audience even without a caption. Then photo is good. A photograph is worth a thousand words.
(Not include any quotes)
Second Paragraph (Six Sentences)
About your Place (Location, City, Country)
Mention your full name and where you are from- Pay attention to your grammar and avoid using the phrase “myself so and so.” Say ‘I am’ or ‘My name is’ instead. Mention the location to which you belong.
For example, I am Jinto Abraham, born and raised in Jaipur.
About Formal Education (+2 or Degree or Post Graduation and include the college name too).
For example, I graduated my Bachelor of Commerce (Honors) from Christ College, Bengaluru in 2018.
About Photography and Cinematography Education (PDAP, KGTE, MESC and College name also).
Next, discuss your highest qualification, emphasising the skills that will be useful for this job.
For example, I have completed my Professional Diploma In Art of Photography, KGTE in Photography and Director of Photography (NSQF level 7), Assistant Cameraman (NSQF level 4) from Creative Hut Institute of Photography.
Third Paragraph (Five Sentences)
About your Previous Experience or Project you have done in Photography, Cinematography, Graphic Design, Editing etc.
For example, I created a Creative Photography Portfolio titled “title” as well as a Commercial Portfolio titled “title.” In addition, I have completed a digital marketing and brand book titled “title.” Finally completed my cinematography portfolio based on the short film “titled.”
Your Achievements (Any awards)
If you have attended or participated in any college events and received any prizes or achievements, please include them in your candidate self-introduction.
For example, I had an opportunity to participate in the state-level photography contest and had won 2nd prize.
Fourth Paragraph (Five Sentences)
What is your next Plan?
For example, I am enthusiastic about entering the world of photography and cinematography in order to make a positive social impact. Every project is a task and I consider it as an opportunity to explore the visual field. It’s an encouragement to work more efficiently and give my best in all the upcoming projects in different genres of photography and cinematography.
EXCLUDES
- If you are applying for a Photography or Cinematography job; do not write, “In the future, I want to start a business, work as a freelancer, and so on.”
- If you are looking for work in commercial photography or cinematography; don’t mention, “I want to be a wildlife photographer.” However, if you are applying for Wildlife Photography jobs, do not include the phrase “I want to be a commercial photographer.”
Make it clear what you want to be.
Guided by
Software : Adobe InDesign for Layout
Editing : Adobe Photoshop & Adobe Lightroom
Fine Tuning Software’s
- Nik Collection
- Imagenomic
- Topaz Labs
Designing Book – InDesign
Create page
Document pages are printable pages. This pages that are either facing or non-facing. Facing pages are two or more pages next to each other like as notebook. Non-Facing pages are down by down to each other like a single notebook paper.
Follow any Major forms of photojournalism like Photo Story, Photo essay, Photo Experience, Photo Novel. And also you can follow Journalism way of writings like inverted Pyramid, Narrative, Chronological Order, Hourglass etc..
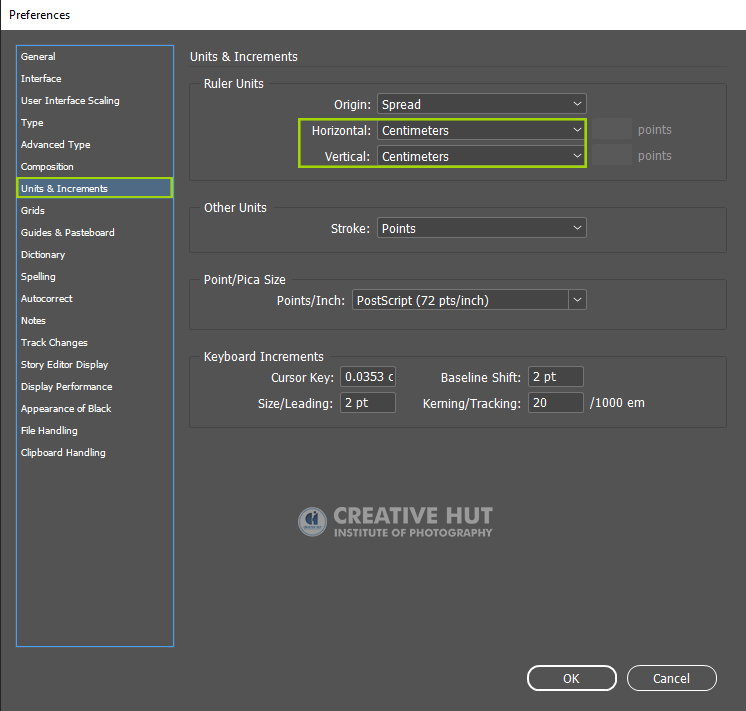
Step 1 : Make Unit to a Centimeters
Edit > Preferences > Units & Increments > Origin : Spread
Horizontal : Centimeters
Vertical : Centimeters
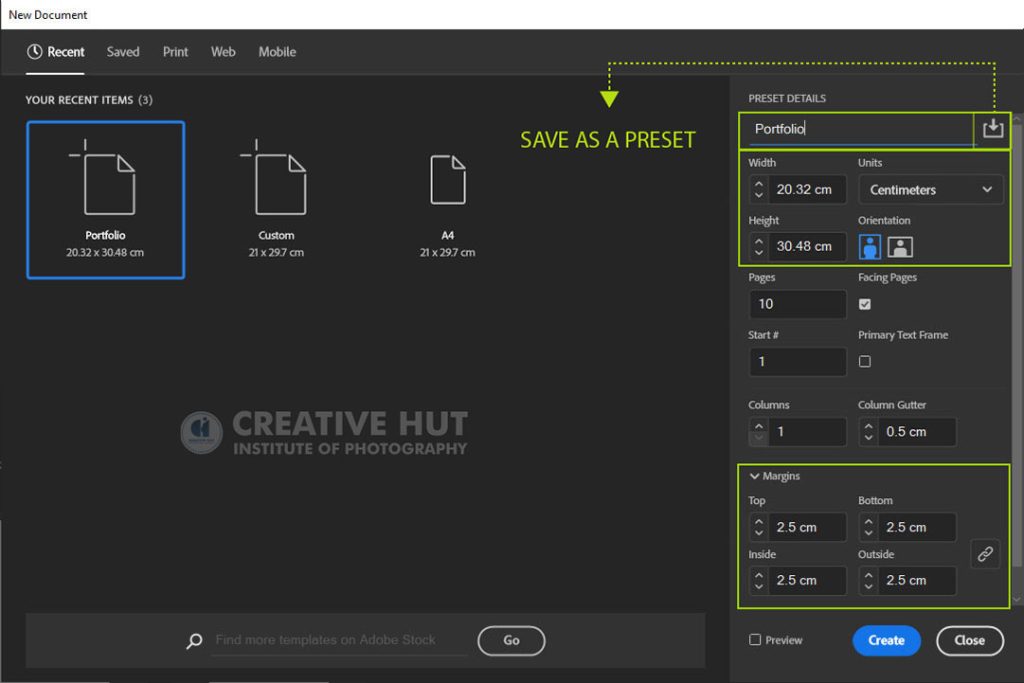
Step 2 : Create a New Document

File >New> Document
Document Size
Width = 20.32 cm | Height = 30.48
Margin = Top : 2.5cm | Bottom : 2.5cm
Inside : 2.5cm | Outside : 2.5cm
Save as Preset “Portfolio”> Ok
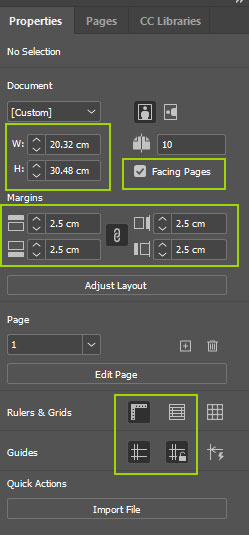
After Creating the Page Go to Window>Select Properties > Check once more the above Measurement. And tick Facing Pages (Double Pages).
Master page
It is a nonprinting page that you can use as the template.
If you apply any footer or header, page no. it will appear automatically in every document pages.

Create a Master Page for
General Page | A Parent
Default Page (If any changes needed right click and edit and correct it)
Prefix : A Parent
Name : General
Based on Parent : None
Number of Pages : 2
Page Size : Custom
Create a Margin – Drag the margin (Ctrl +R ) according to the measurement.
Margin = Top : 2.5cm | Bottom : 2.5cm
Inside : 2.5cm | Outside : 2.5cm
Book Cover | B Parent
Right click above Master Page and select New parent Page.
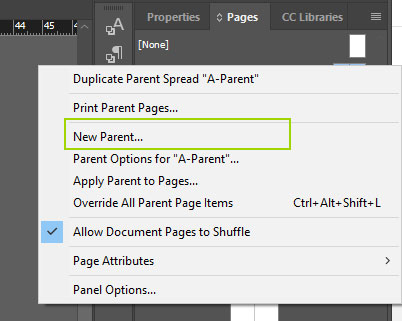
New window will open.
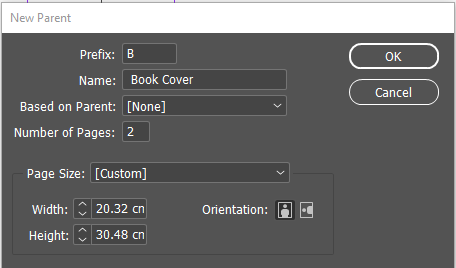
Prefix : B Parent
Name : Book Cover Page
Based on Parent : None
Number of Pages : 2
Page Size : Custom
Rename the Master Page
To rename the master page, you have a couple of options:
Option 1: Direct Double-Click: Simply double-click slowly on the master page’s name (not on the page thumbnail, but the name itself). After a moment, the name will become editable, allowing you to type a new name.
Option 2: Right-Click and Rename: Alternatively, you can right-click (or Ctrl-click on a Mac) on the master page’s name or thumbnail and select Master Page Options from the context menu. In the dialog box that appears, you can type a new name in the Name field.
Create a Margin
(Drag the margin according to the measurement)
View Rulers: Ensure that rulers are visible. If not, go to View > Show Rulers or press Ctrl (or Cmd on Mac) + R.
Create a New Guide: To create a guide, click on the horizontal or vertical ruler and drag onto the document. Release the mouse where you want the guide to be placed.
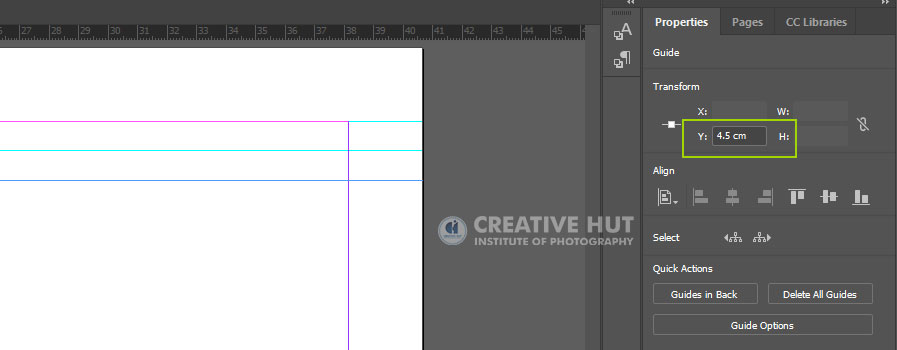
Set Precise Guide Position: For exact positioning, after you’ve dragged out a guide, you can fine-tune its position. With the guide selected (use the Selection Tool if necessary), look at the control panel at the top of the InDesign window. Here, you can enter exact values for the guide’s position. For example, if you dragged a vertical guide, you can set its exact X position (horizontal measurement), or for a horizontal guide, set the Y position (vertical measurement).
Saving Guide Sets: If you have a set of guides you use regularly, you can save them. Go to Layout > Ruler Guides > Save Guides as Default for the current document, or Save Guides to save them for use in other documents.
Add numbering to pages
Create a Master Page: Master pages are used in InDesign to apply consistent layout elements across multiple pages. If you haven’t already created a master page, you should do so. In the Pages panel, you’ll see the master pages at the top and the document pages below. Double-click on the master page to edit it.
Create a Master Page: Master pages are used in InDesign to apply consistent layout elements across multiple pages. If you haven’t already created a master page, you should do so. In the Pages panel, you’ll see the master pages at the top and the document pages below. Double-click on the master page to edit it.
Insert the Page Number Marker: With the text frame selected, go to Type > Insert Special Character > Markers > Current Page Number. This will insert a placeholder character that represents the page number.
Insert a Text Frame for Page Numbers: Select the Text Tool (T) and draw a text frame where you want the page number to appear. You can create this text frame on any part of the master page (e.g., header or footer).
Style the Page Number (Optional): You can now format the text as desired—change the font, size, color, etc., to match your document’s design.
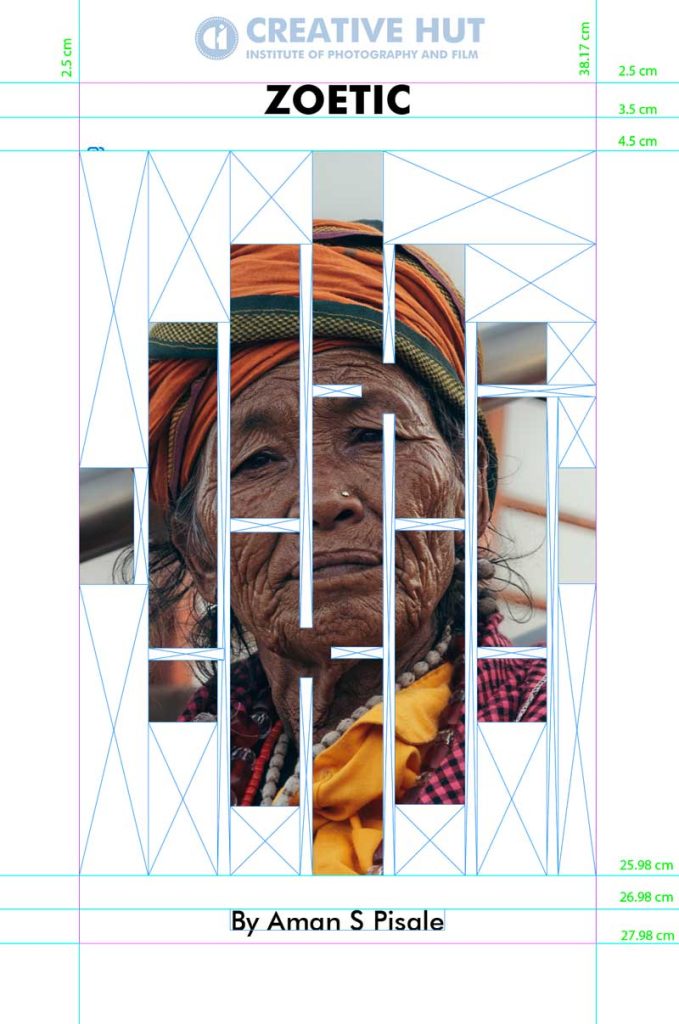
First Guide Line (from top) : 2.5 cm
Second Guide Line (from top) : 3.5 cm
Third Guide Line (from top) : 4.5 cm
Fourth Guide Line (from top) : 25.98 cm
Fifth Guide Line (from top) : 26.98 cm
Sixth Guide Line (from top) : 27.98 cm
Title Page | C Parent
- Right click above Master Page and select New parent Page.
- Prefix : C Parent
- Name : Content Page
- Based on Parent : None
- Number of Pages : 2
- Page Size : Custom
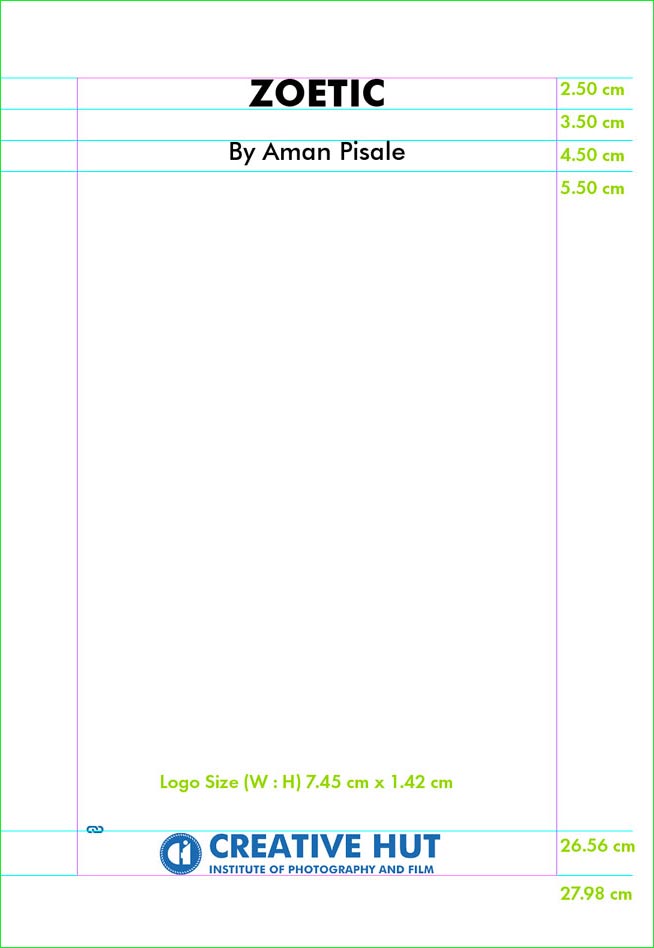
- Create a Margin
- (Drag the margin according to the measurement.)
- First Guide Line : 2.5 cm
Second Guide Line : 3.5 cm
Third Guide Line : 4.5 cm
Fourth Guide Line : 5.5 cm
Fifth Guide Line : 26.56 cm
Sixth Guide Line : 27.98 cm
Copyright Page | D Parent
- Right click above Master Page and select New parent Page.
- Prefix : D Parent
- Name : Content Page
- Based on Parent : None
- Number of Pages : 2
- Page Size : Custom
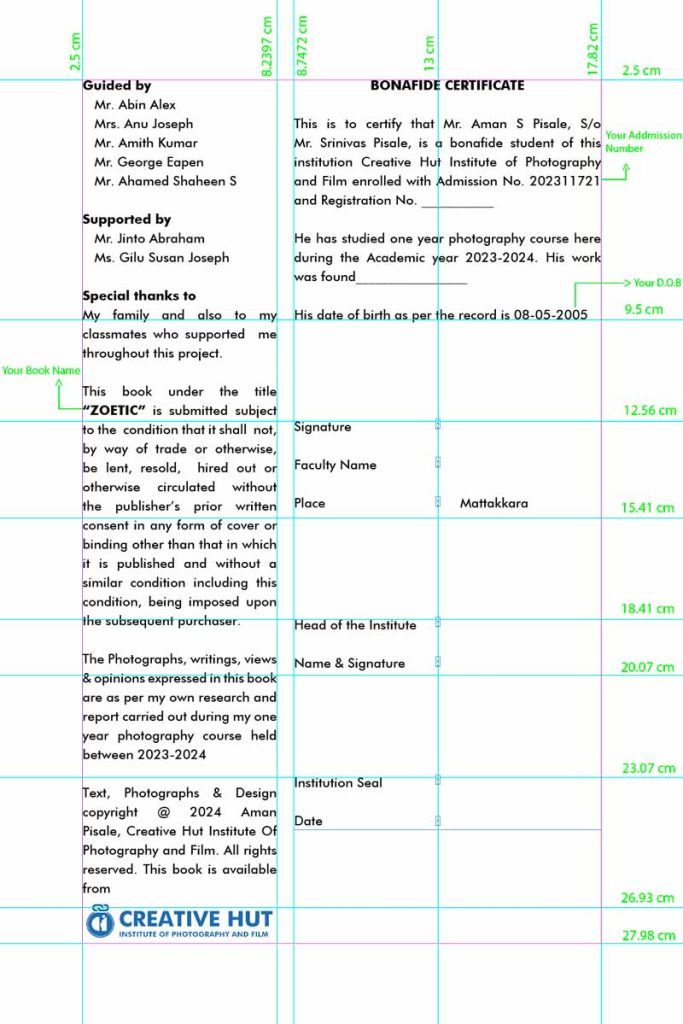
- Create a Margin
- (Drag the margin according to the measurement.)
- First Guide Line : 2.5 cm
Second Guide Line : 26.93 cm
Third Guide Line : 27.98 cm
Index Page | E Parent
- Right click above Master Page and select New parent Page.
- Prefix : E Parent
- Name : Content Page
- Based on Parent : None
- Number of Pages : 2
- Page Size : Custom
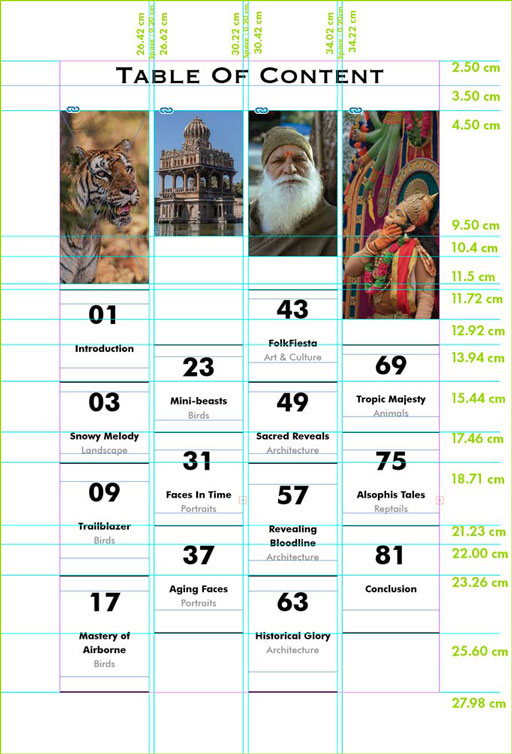
- Create a Margin for Right side Page
- (Drag the margin according to the measurement.)
- First Guide Line (from top) : 2.5 cm
Second Guide Line (from top) : 3.5 cm
Third Guide Line (from top) : 4.5 cm
Fourth Guide Line : 9.5 cm
Fifth Guide Line : 10.40 cm
Sixth Guide Line : 11.50 cm - Seventh Guide Line : 11.72 cm
- Eighth Guide Line : 12.92 cm
- Nine Guide Line : 13.94 cm
- Ten Guide Line : 15.44 cm
- Eleven Guide Line : 17.46 cm
- Twelve Guide Line : 18.71 cm
- Thirteen Guide Line : 21.23 cm
- Fourteen Guide Line : 22.00 cm
- Fifteen Guide Line : 23.26 cm
- Sixteen Guide Line : 25.60 cm
- Seventeen Guide Line : 27.98 cm
Content Page | F Parent
- Right click above Master Page and select New parent Page.
- Prefix : F Parent
- Name : Content Page
- Based on Parent : None
- Number of Pages : 2
- Page Size : Custom

- Create a Margin for Right side Page
- (Drag the margin according to the measurement.)
- First Guide Line : 2.50 cm
Second Guide Line : 4.50 cm
Third Guide Line : 5.50 cm
Fourth Guide Line : 650 cm
Fifth Guide Line : 8.50 cm
Sixth Guide Line : 10.00 cm - Seventh Guide Line : 24.98 cm
- Eighth Guide Line : 27.98 cm
Image Portrait Page | G Parent
- Right click above Master Page and select New parent Page.
- Prefix : G Parent
- Name : Image Portrait Page
- Based on Parent : None
- Number of Pages : 2
- Page Size : Custom
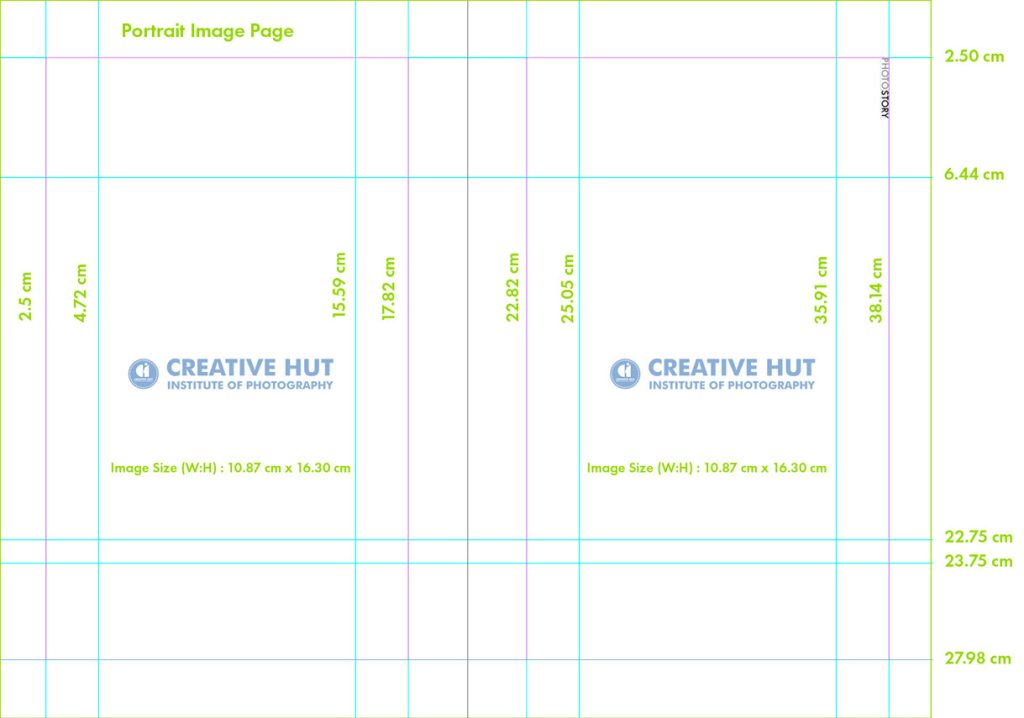
- Create a Margin
- Drag the margin according to the measurement.
- First Guide Line : 2.50 cm
Second Guide Line : 6.44 cm
Third Guide Line : 22.75 cm
Fourth Guide Line : 23.75 cm
Fifth Guide Line : 27.98 cm
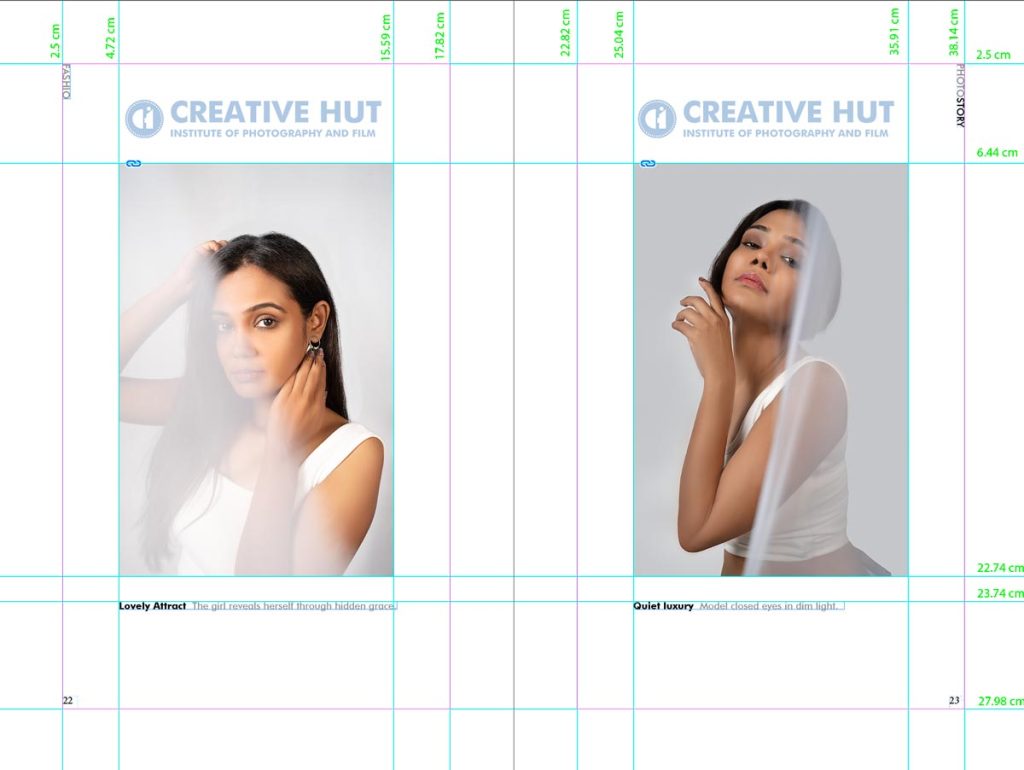
Image Landscape Page | H Parent
- Right click above Master Page and select New parent Page.
- Prefix : H Parent
- Name : Image Portrait Page
- Based on Parent : None
- Number of Pages : 2
- Page Size : Custom
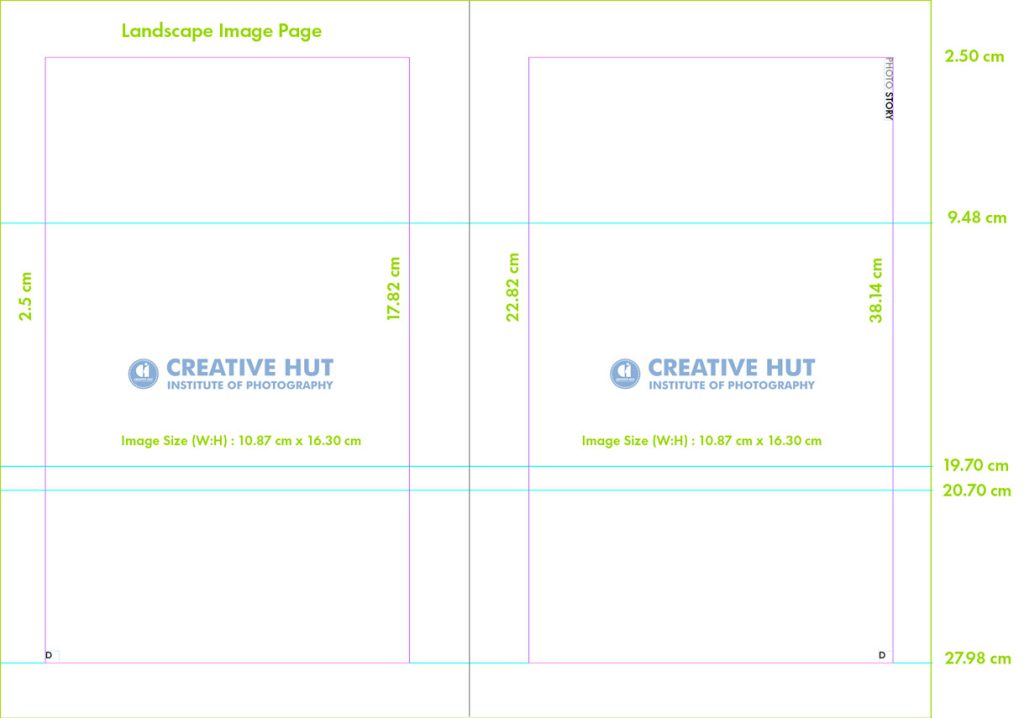
- Create a Margin for Right side Page
- Drag the margin according to the measurement.
- First Guide Line (from top) : 2.5 cm
Second Guide Line (from top) : 9.48 cm
Third Guide Line (from top) : 19.70 cm
Fourth Guide Line : 20.70 cm
Fifth Guide Line : 27.98 cm
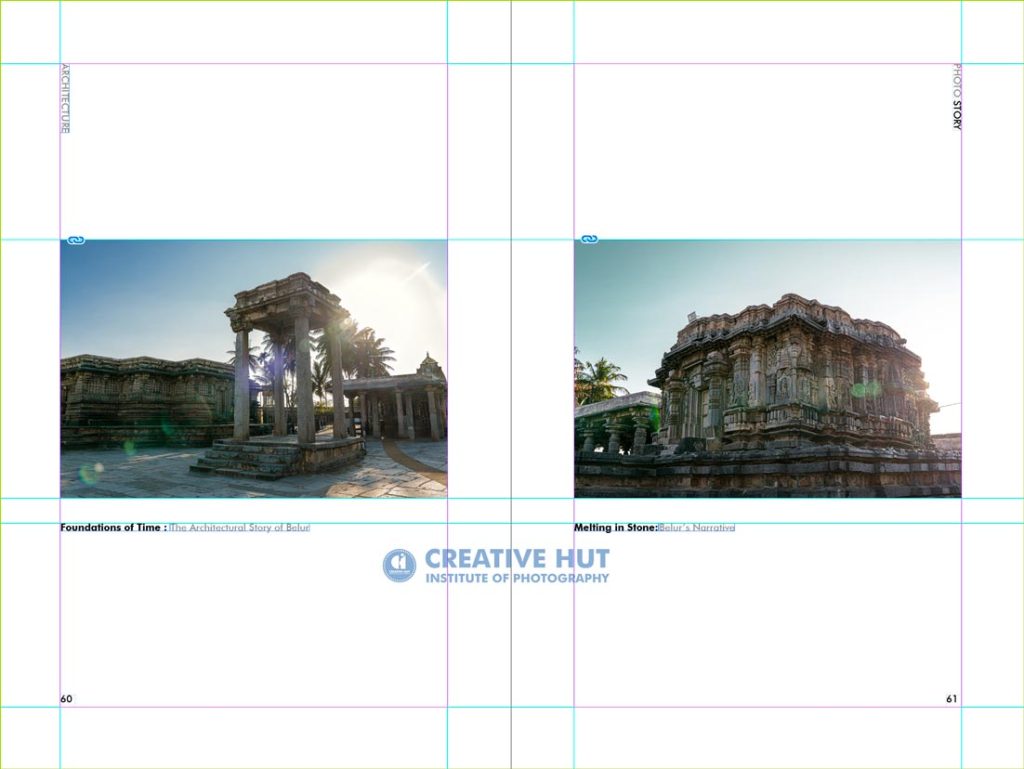
Book Back Cover Page | I Parent
- Right click above Master Page and select New parent Page.
- Prefix : I Parent
- Name : Book Back Page
- Based on Parent : None
- Number of Pages : 2
- Page Size : Custom
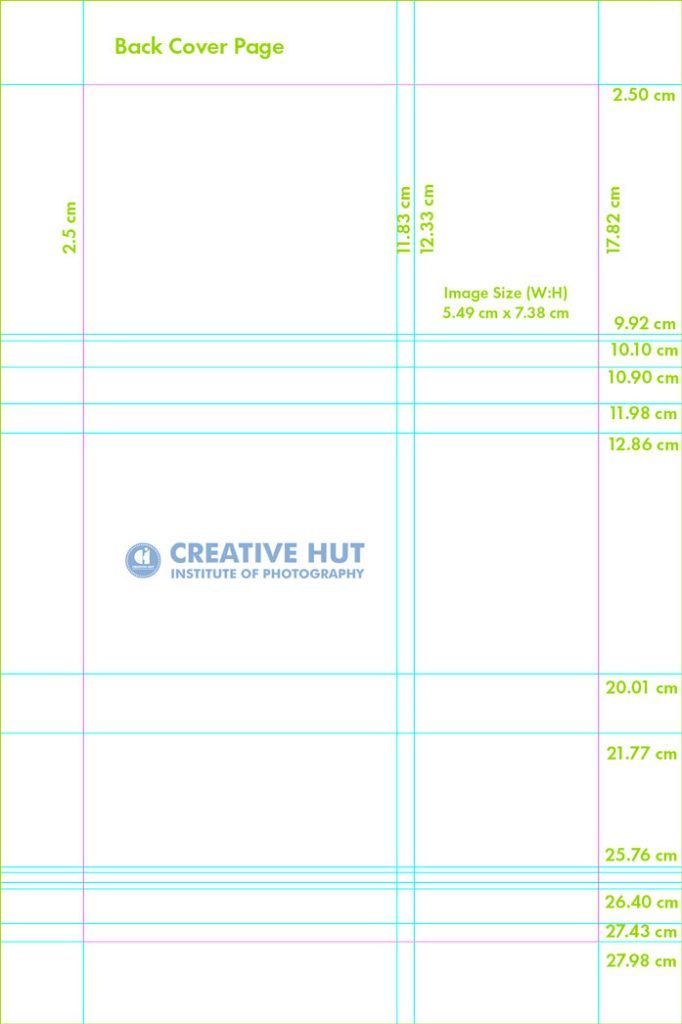
- Create a Margin
- Drag the margin according to the measurement.
- First Guide Line : 2.5 cm
Second Guide Line : 9.92 cm
Third Guide Line : 10.10 cm
Fourth Guide Line : 10.90 cm
Fifth Guide Line : 11.98 cm - Sixth Guide Line : 12.86 cm
- Seventh Guide Line : 20.01 cm
- Eight Guide Line : 21.77 cm
- Ninth Guide Line : 25.76 cm
- Eight Guide Line : 26.40 cm
- Ninth Guide Line : 27.43 cm
- Tenth Guide Line : 27.98 cm
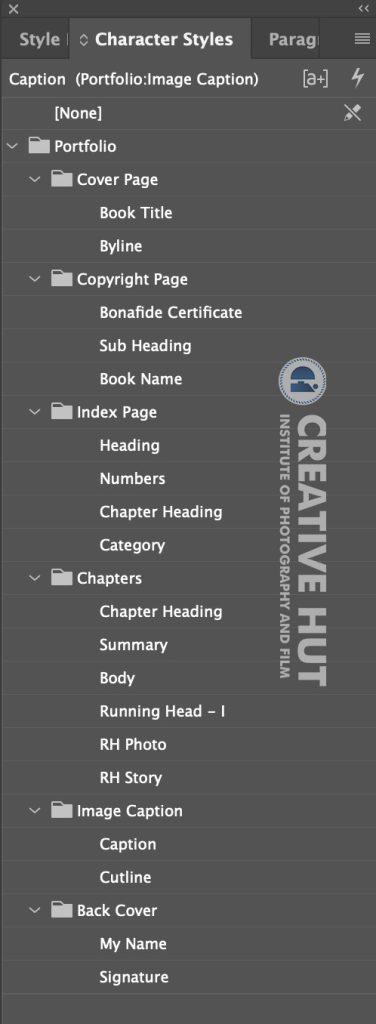
Character Style
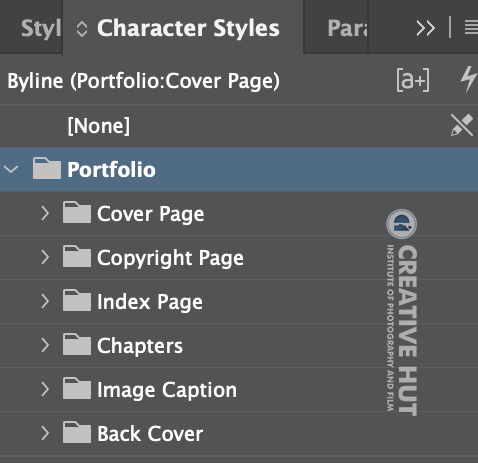
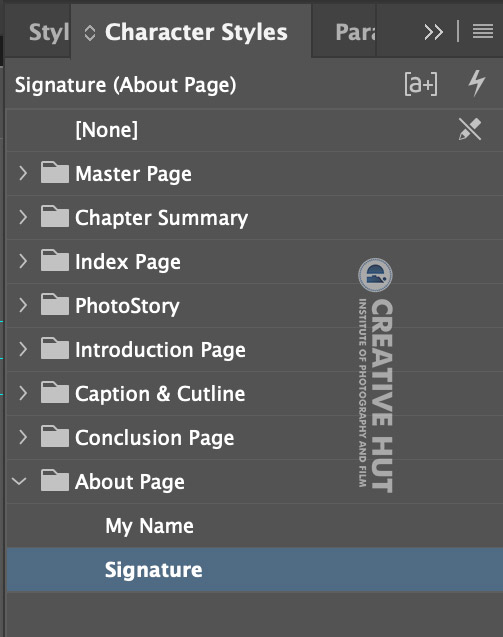
Step One : Open the Character Styles Panel:
Go to Window > Styles > Character Styles. This opens the Character Styles panel.
Step Two : Create a New Character Style:
In the Character Styles panel, you’ll see a list of existing styles (if any). To create a new style, click on the New button at the bottom of the panel (it looks like a page icon), or you can choose New Character Style from the panel menu.
Step Three : Define the Style Settings:
Once you click to create a new style, a dialog box will appear.
Here, you can name your style for easy identification.
Then, go through the various tabs in the dialog box to set the attributes you want for your style. This includes font family, font size, leading, kerning, tracking, font color, and more.
You can also specify more advanced options like character scaling, baseline shift, and language.
Step Four : Apply the Style:
To apply the style, first select the text you want to format.
Then, click on the character style you created in the Character Styles panel.
Step Five : Editing a Style:
If you need to modify a style, right-click (or Ctrl-click on a Mac) on the style in the Character Styles panel and select Edit.
Make the necessary changes in the dialog box that appears, and these changes will automatically apply to all text with that style in your document.
Step Six : Using Style Overrides (Optional):
If you want to make a one-time exception to your style (an override), just change the formatting of the selected text as you normally would. The style name in the Character Styles panel will show a + sign indicating an override.
Step Seven : Clear Overrides:
If you have overrides that you want to clear, select the text and then Alt-click (Option-click on a Mac) on the style name in the Character Styles panel.
Book Cover | Book Title
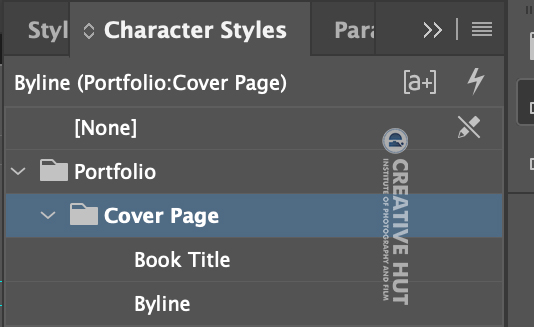
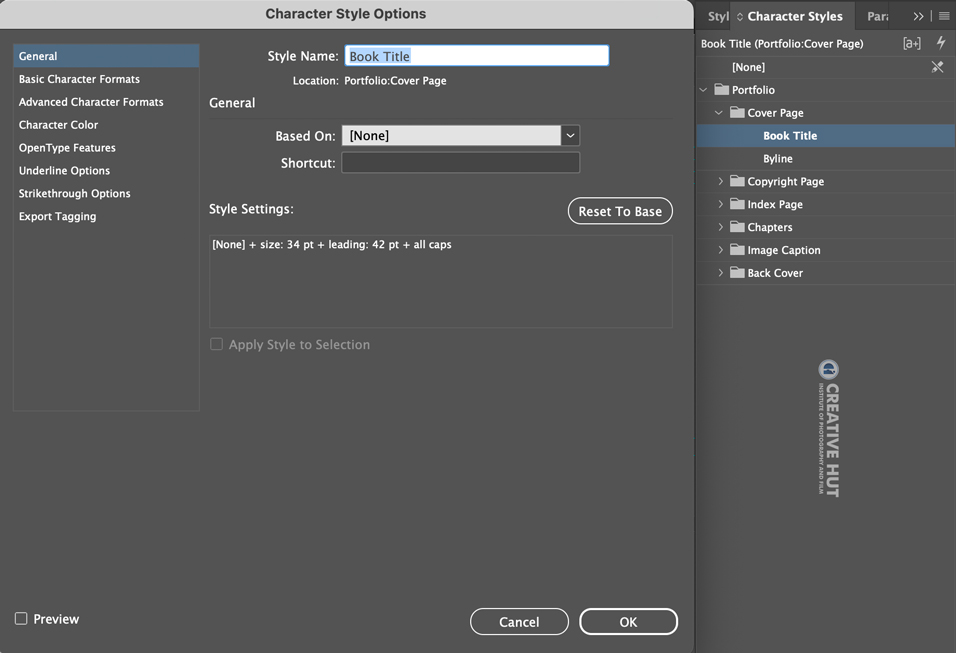
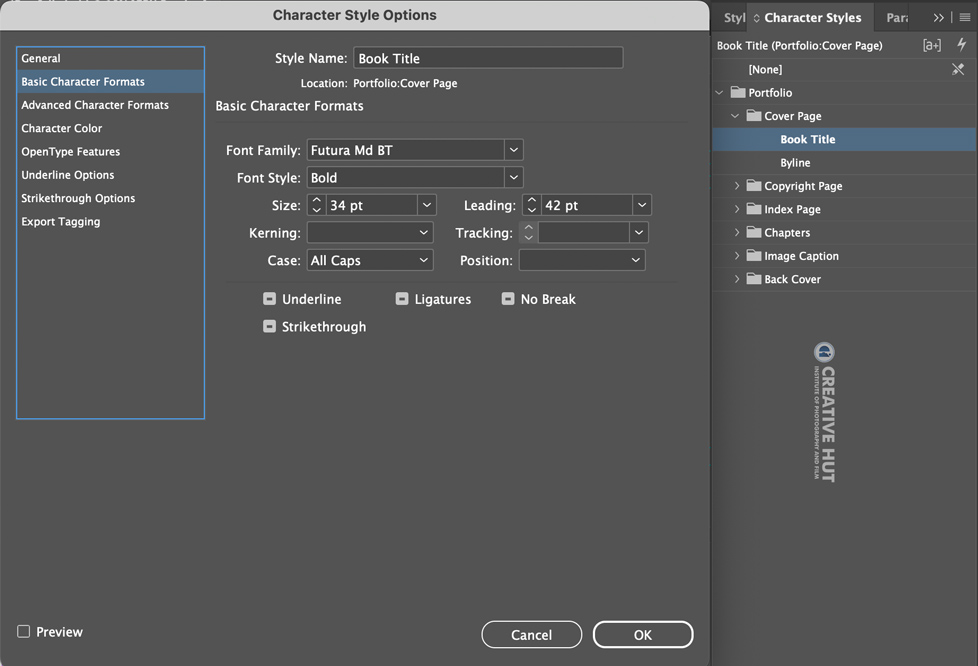
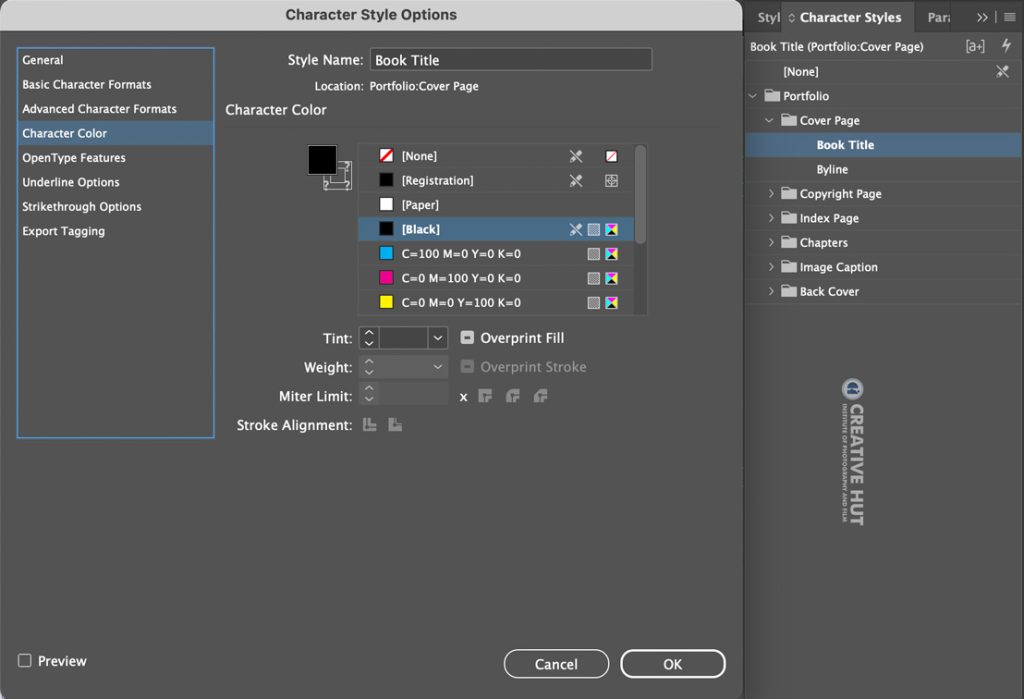
Book Cover | Book Title
Font Family – Futura Md BT
Font Style – Bold
Font Size – 34 pt
Font Leading – 42 pt
Character Color – Black
Fonts to download – Download
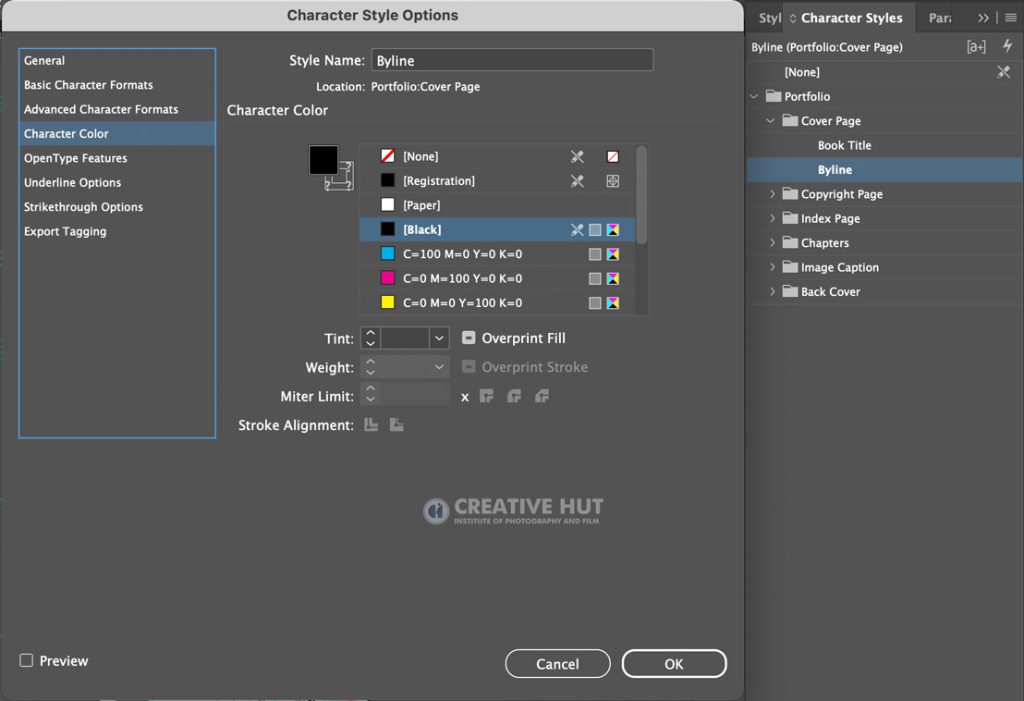
Book Cover | Byline
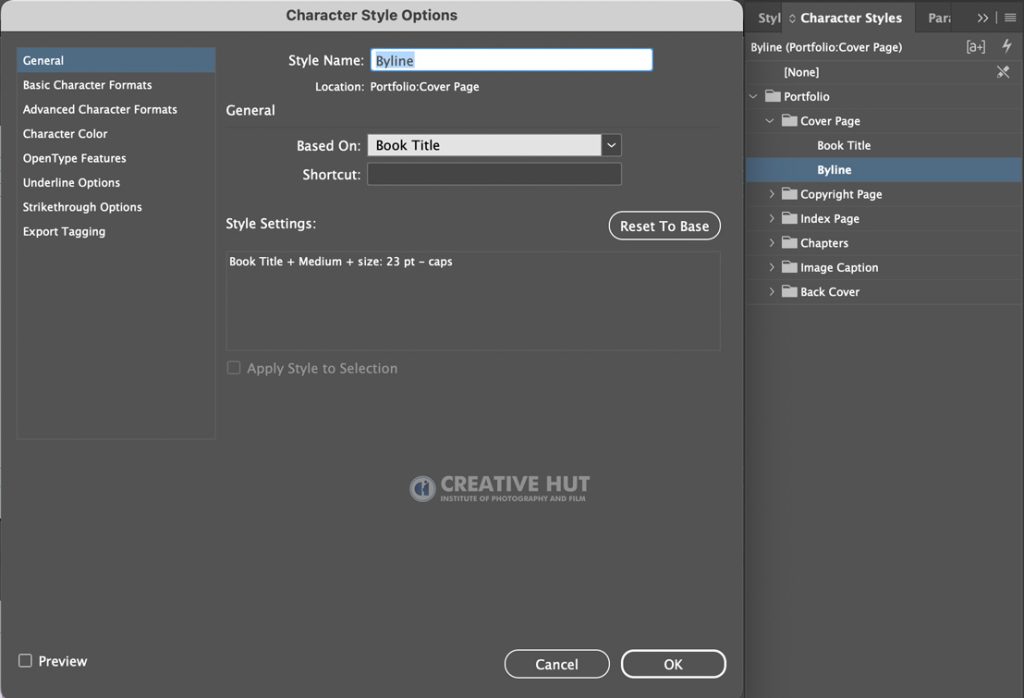
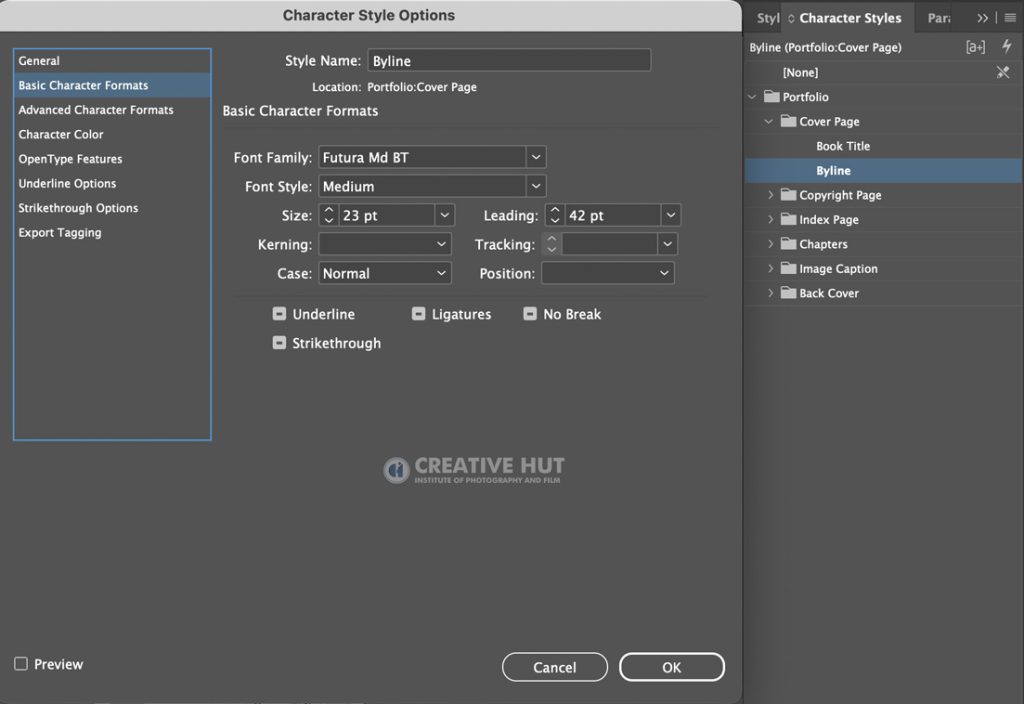
Book Cover | Byline
Font Family – Futura Md BT
Font Style – Medium
Font Size – 23 pt
Font Leading – 42 pt
Character Color – Black
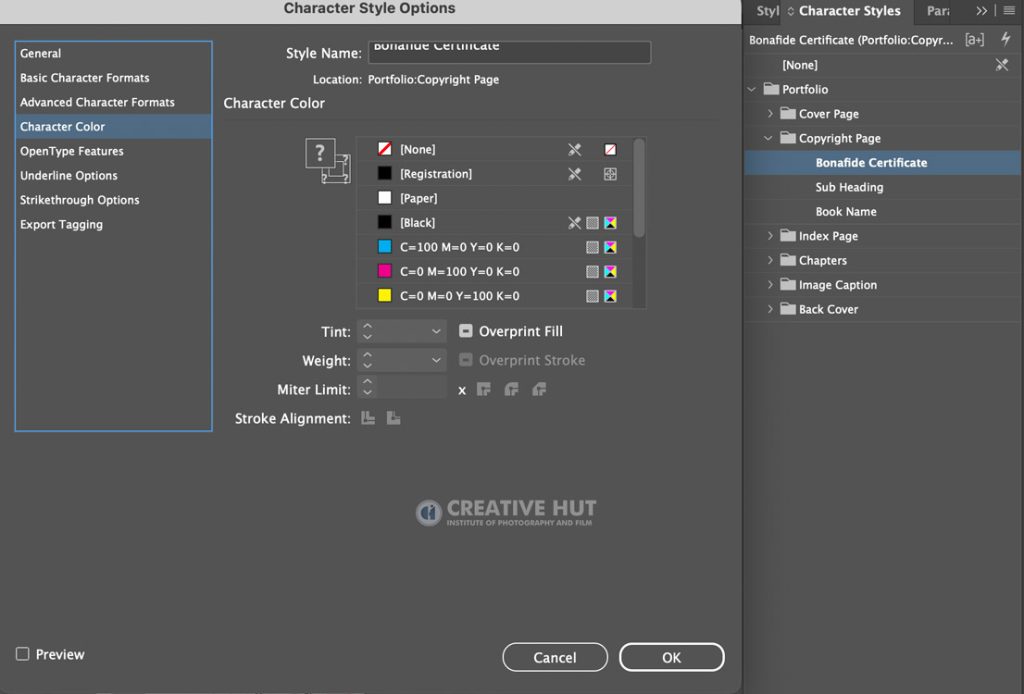
Copyright Page | Bonafide Certificate
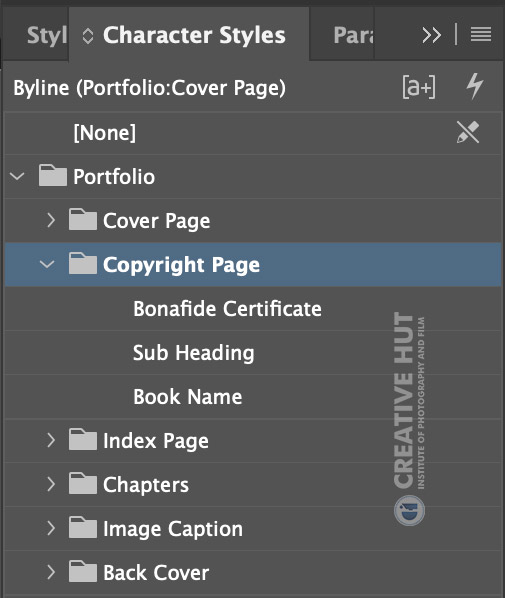
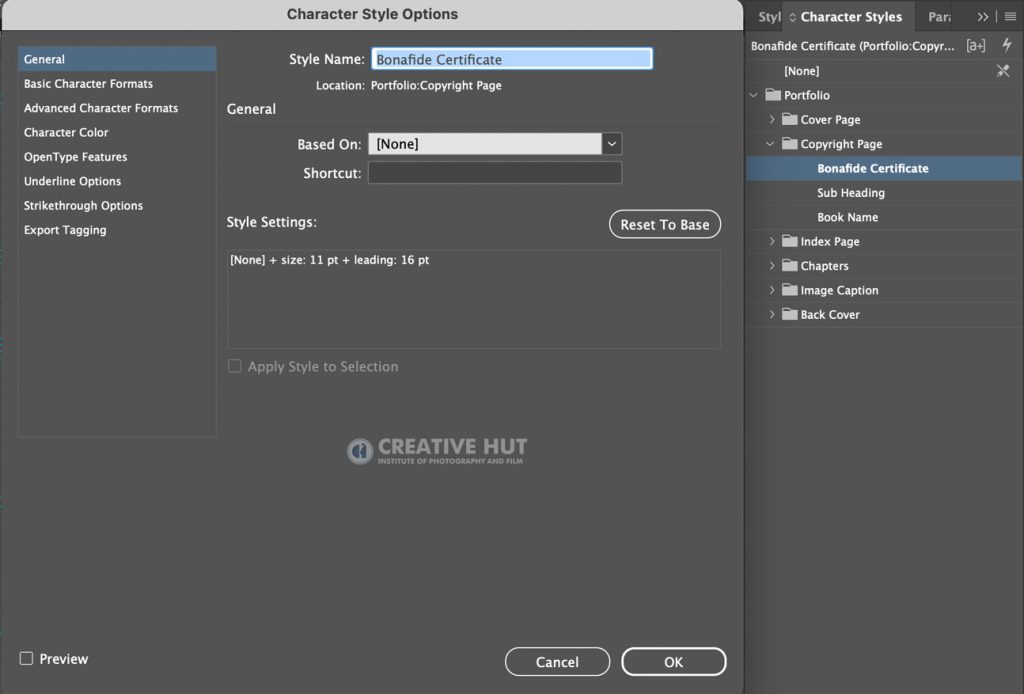
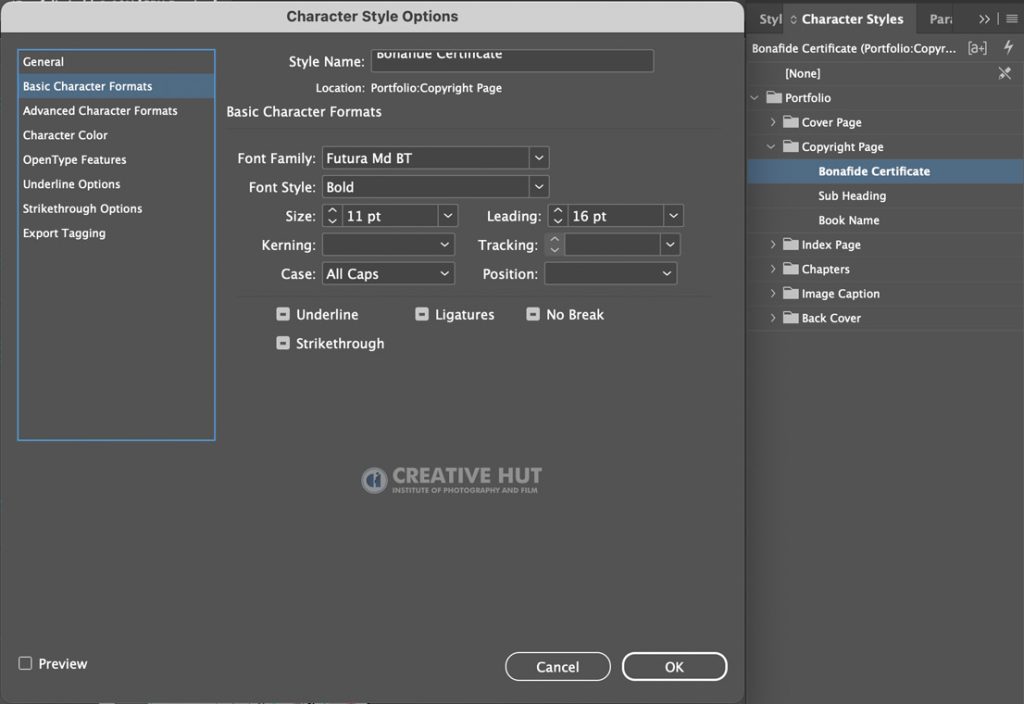
Copyright | Bonafide certificate
Font Family – Futura Md BT
Font Style – Bold
Font Size – 11 pt
Font Leading – 16 pt
Case – All Caps
Character Color – Black
Copyright Page | Subheading
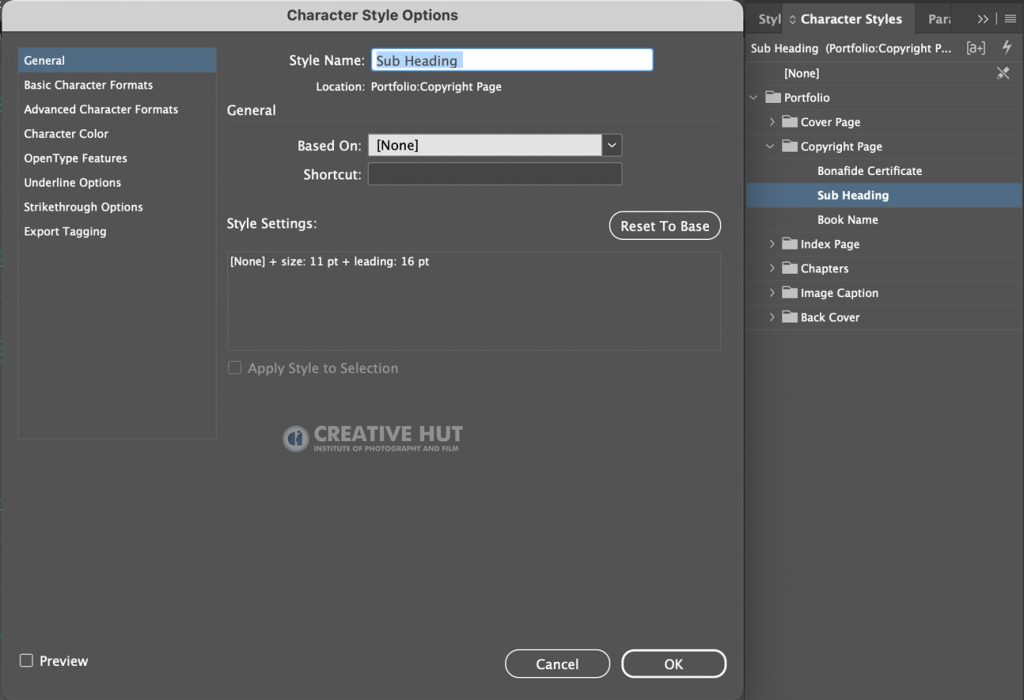
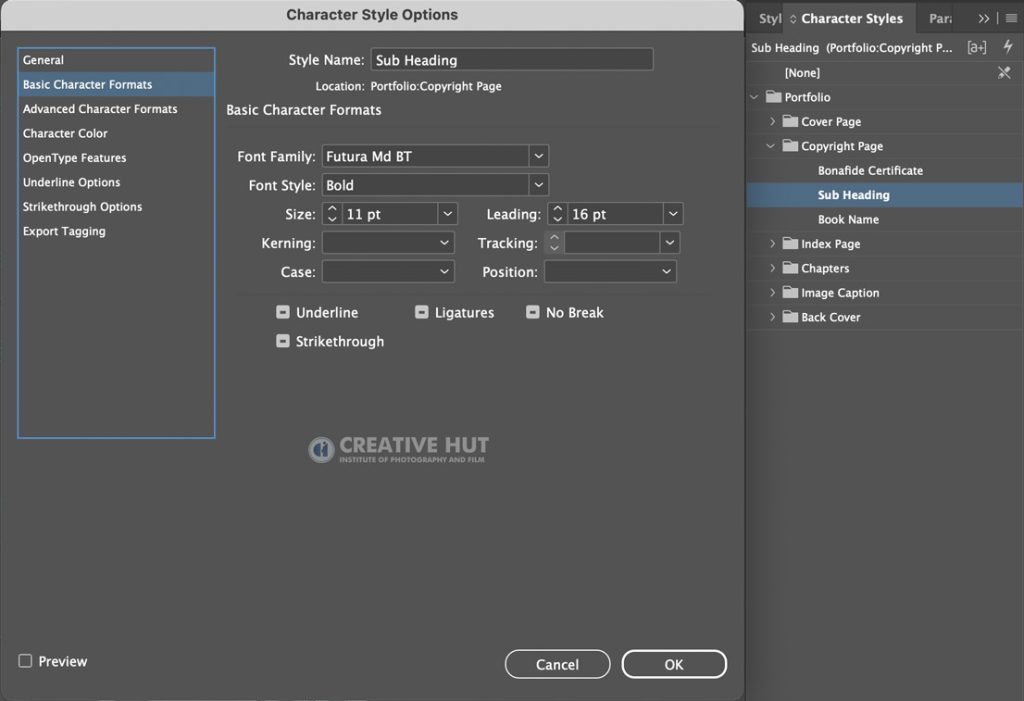
Copyright | Sub Heading
Font Family – Futura Md BT
Font Style – Bold
Font Size – 11 pt
Font Leading – 16 pt
Character Color – Black
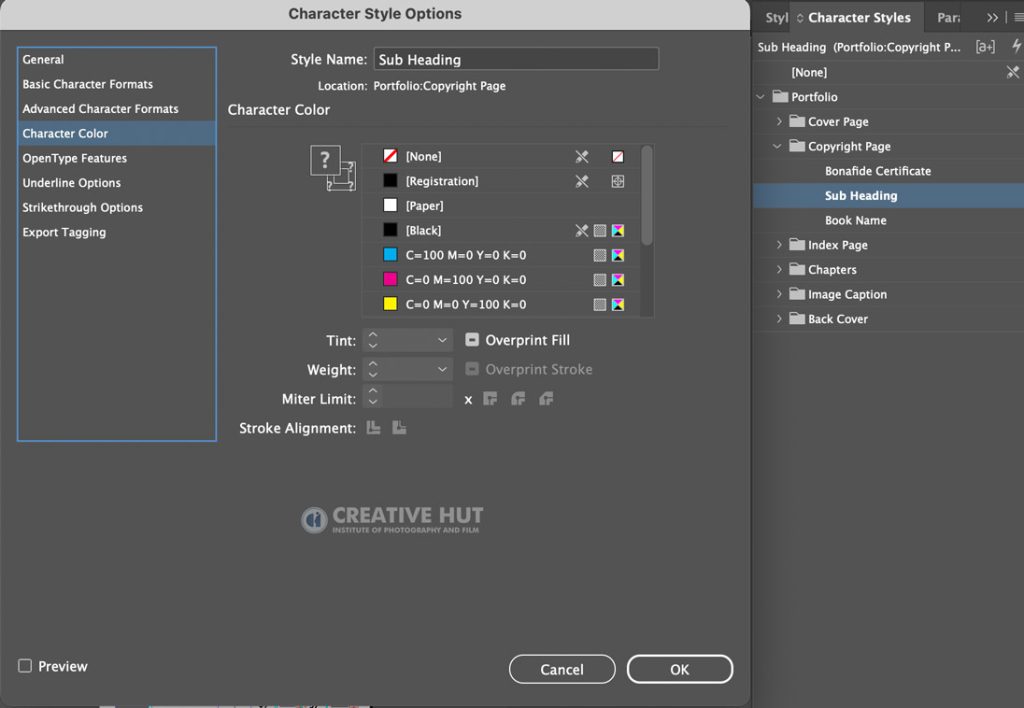
Copyright Page | Book Name
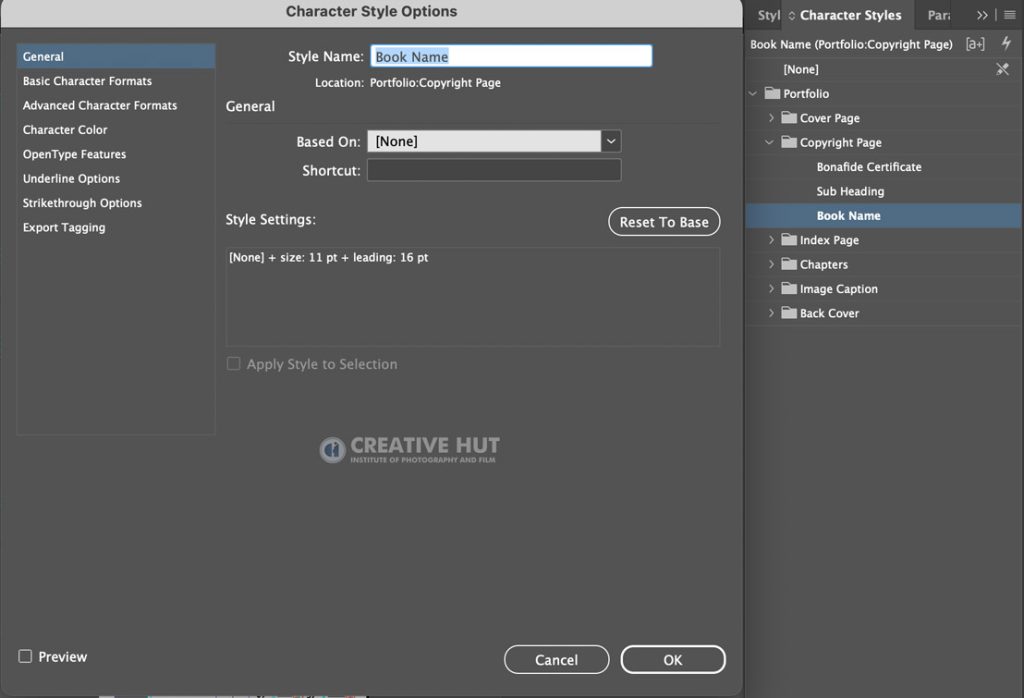
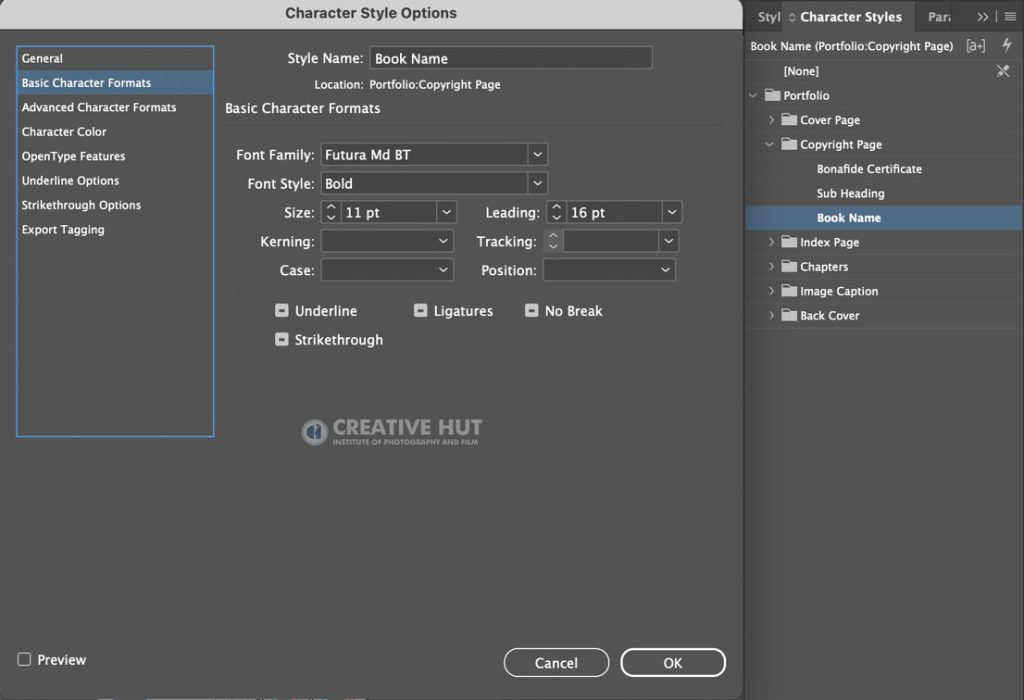
Copyright | Book Name
Font Family – Futura Md BT
Font Style – Bold
Font Size – 11 pt
Font Leading – 16 pt
Character Color – Black
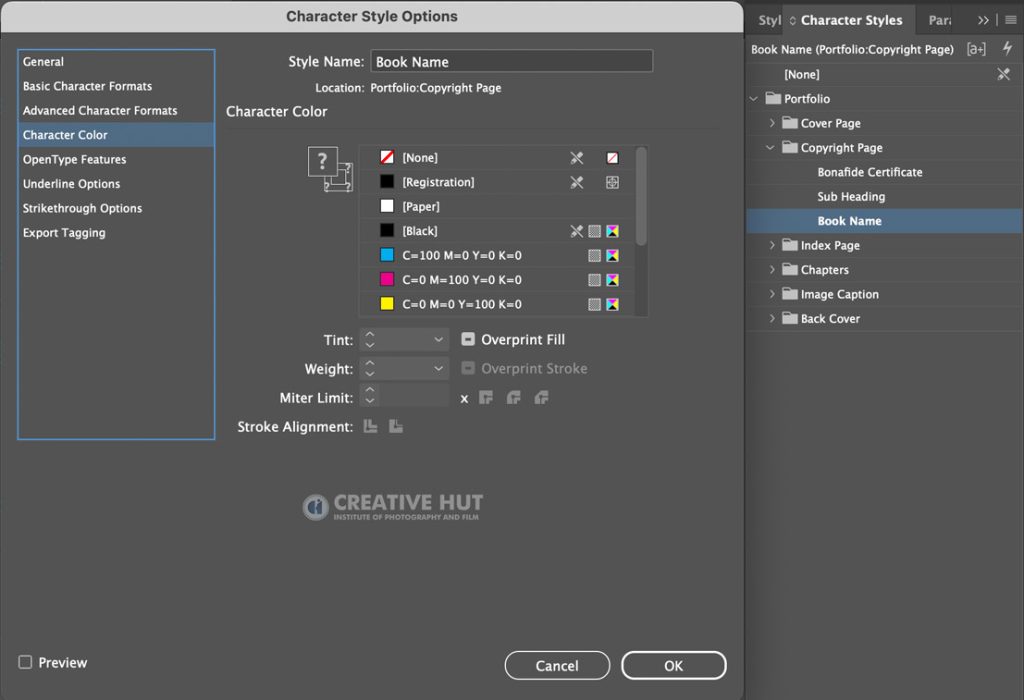
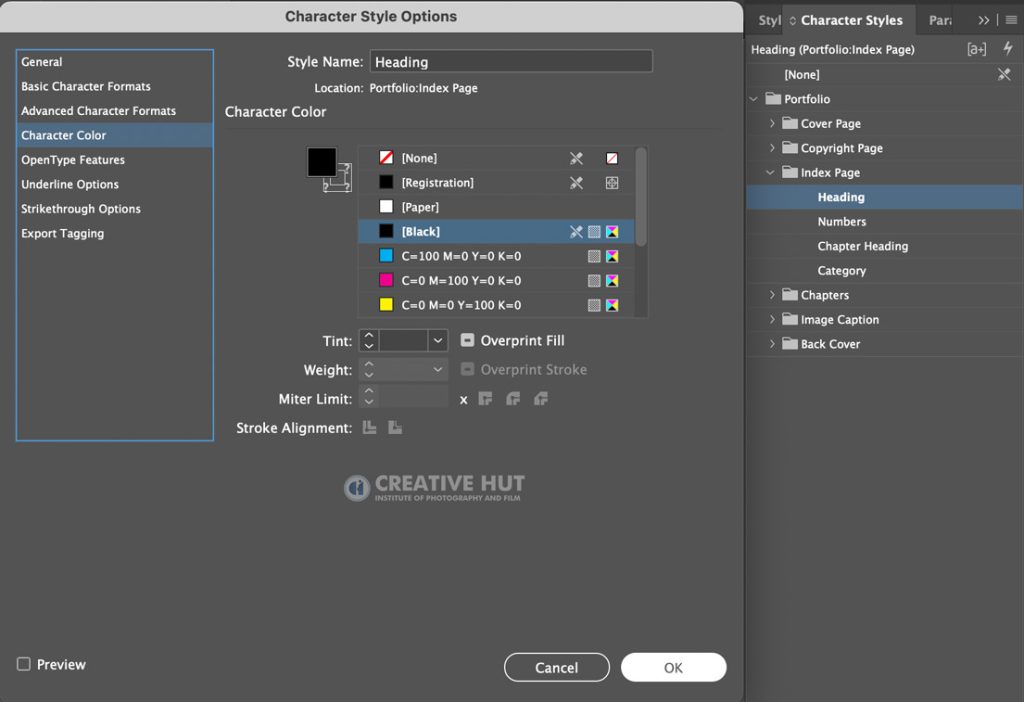
Index Page | Heading
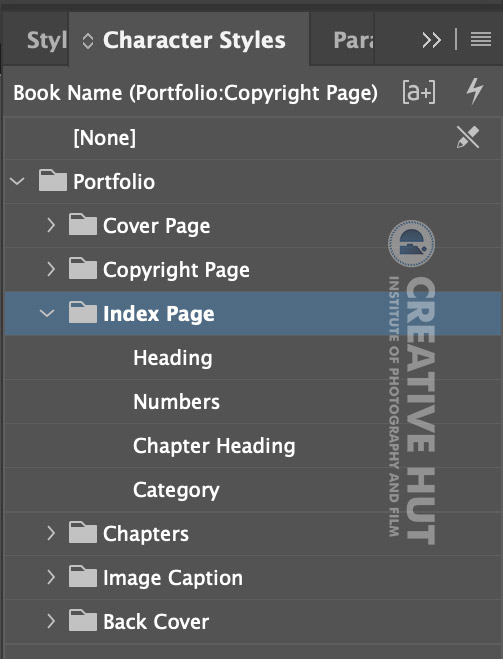
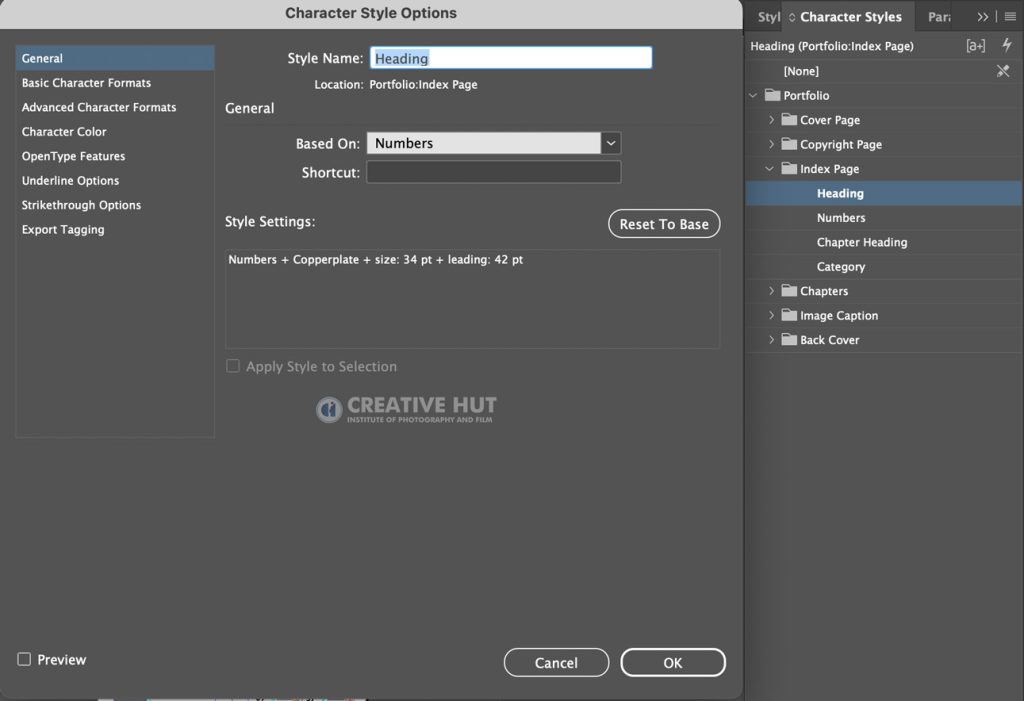
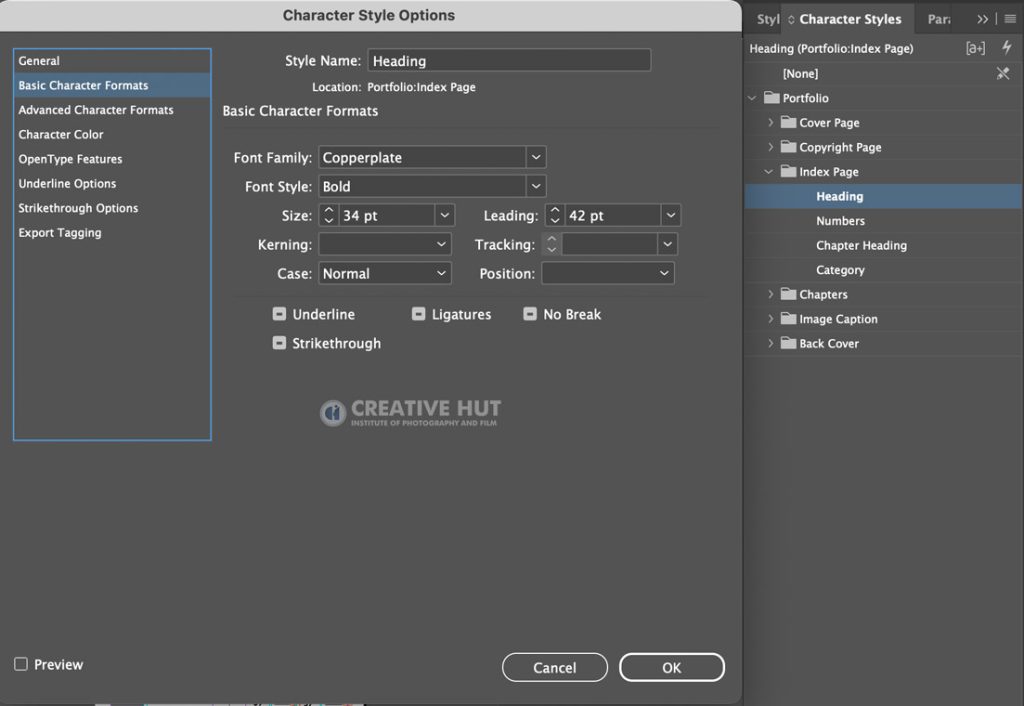
Index Page | Heading
Font Family – Copperplate
Font Style – Bold
Font Size – 34 pt
Font Leading – 42 pt
Character Color – Black
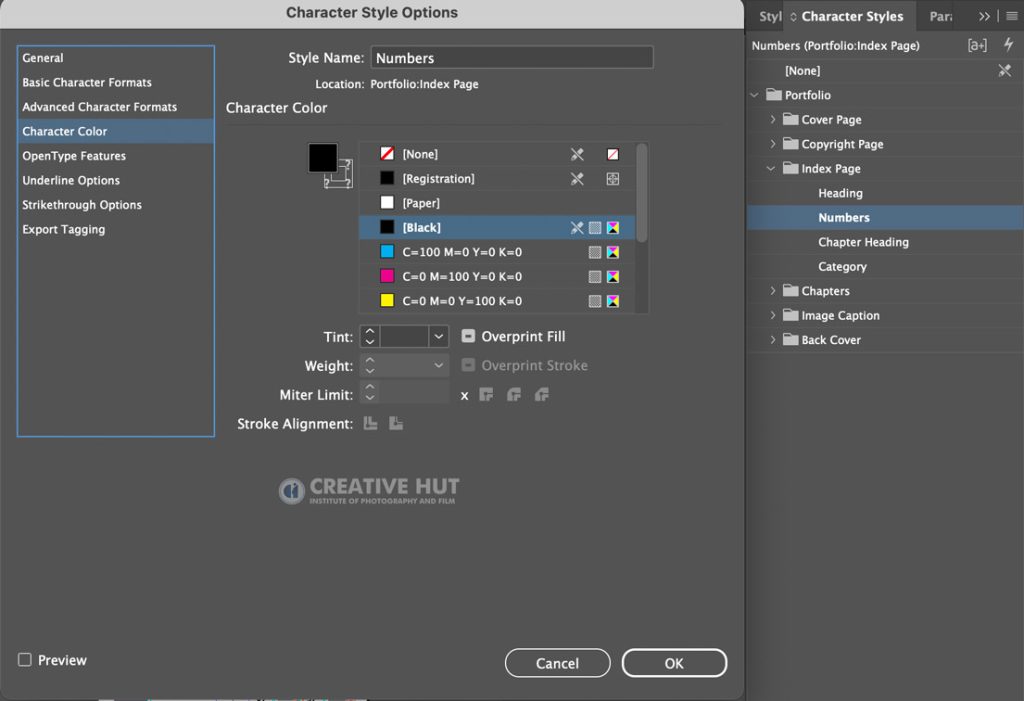
Index Page | Number
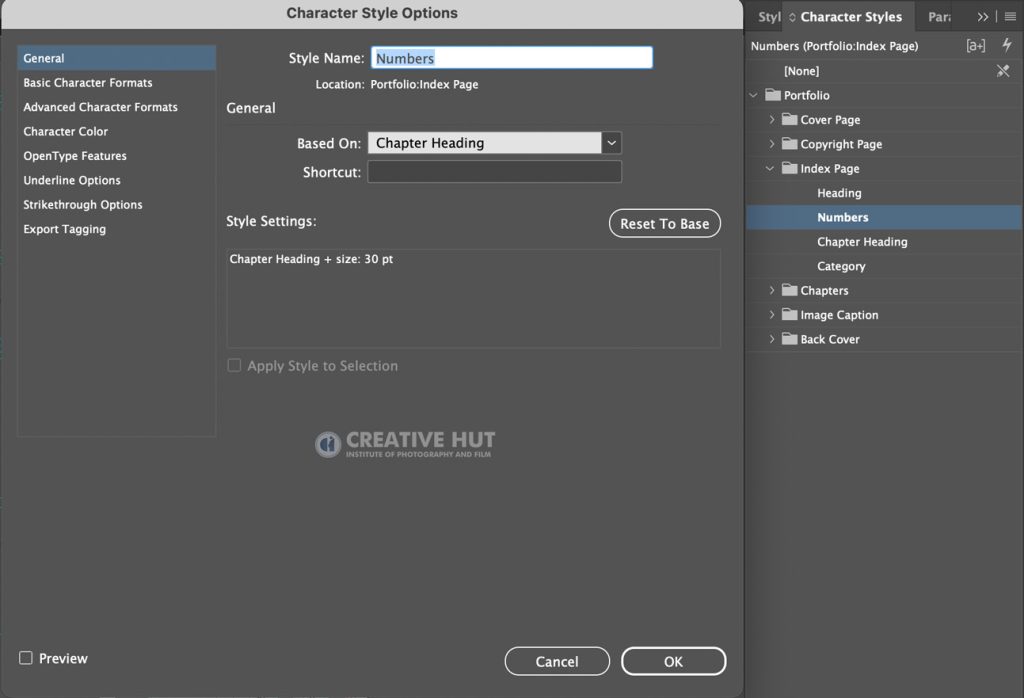
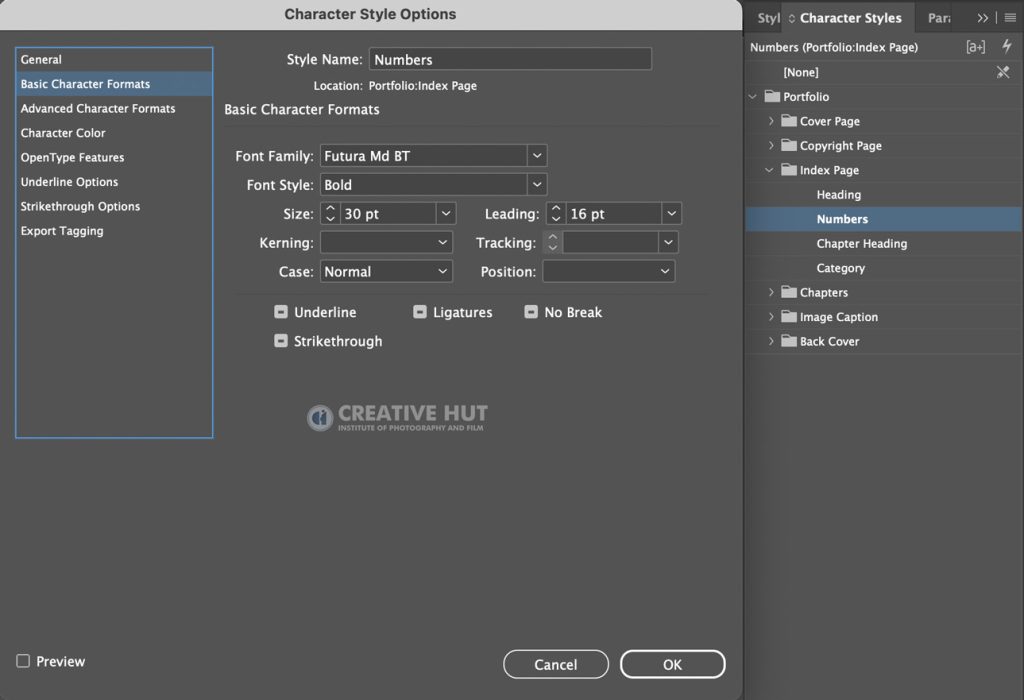
Index Page | Heading
Font Family – Futura Md BT
Font Style – Bold
Font Size – 30 pt
Font Leading – 16 pt
Character Color – Black
Index Page – Chapter Heading
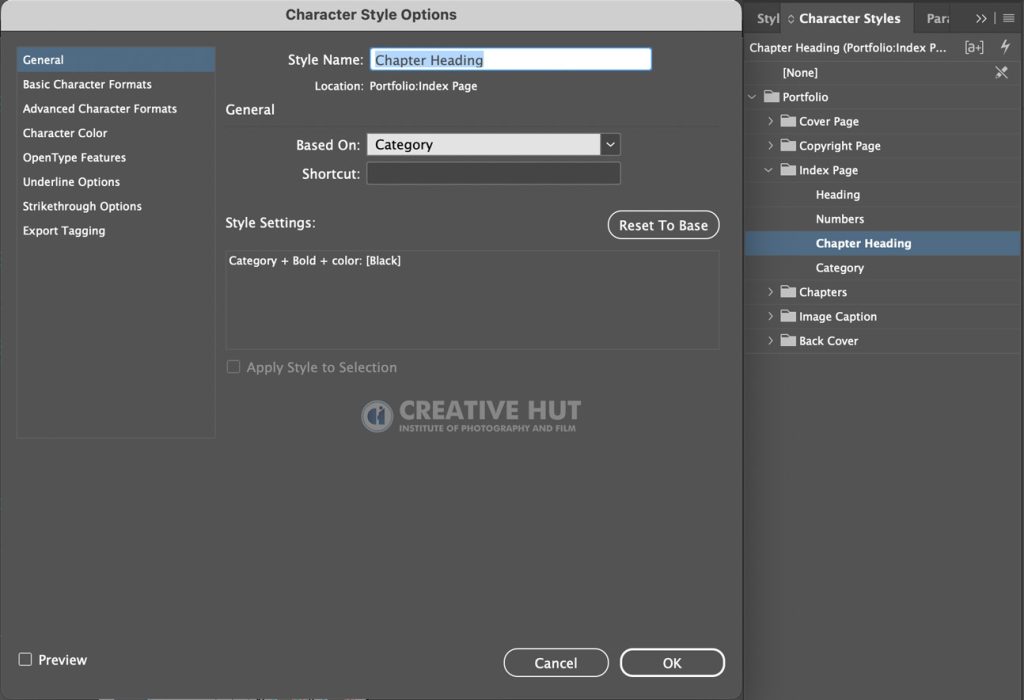
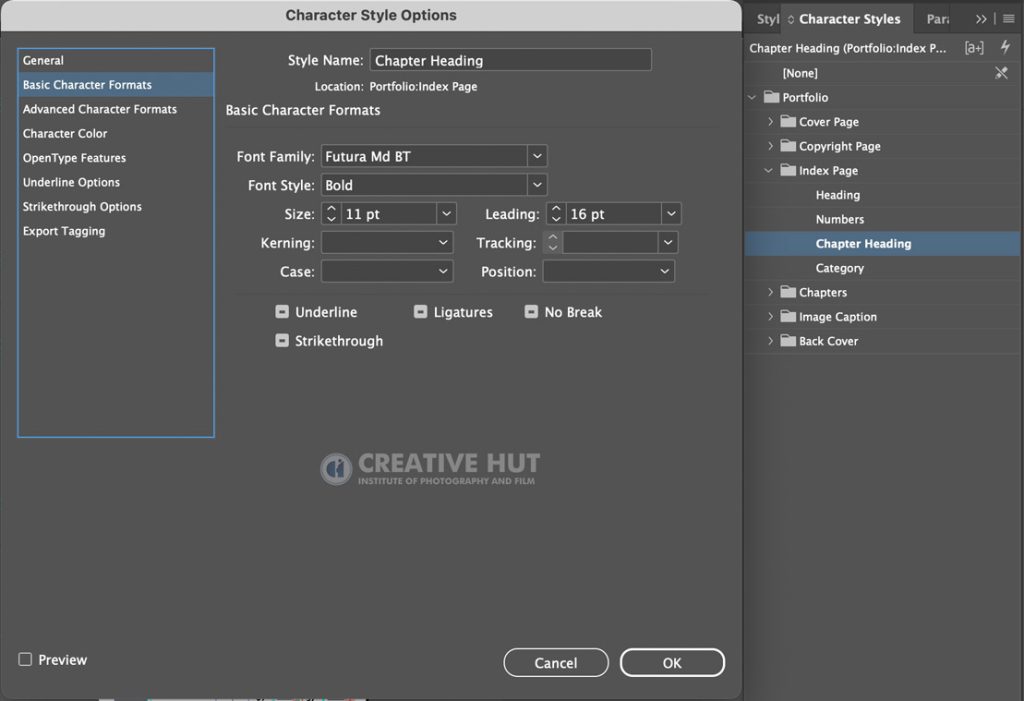
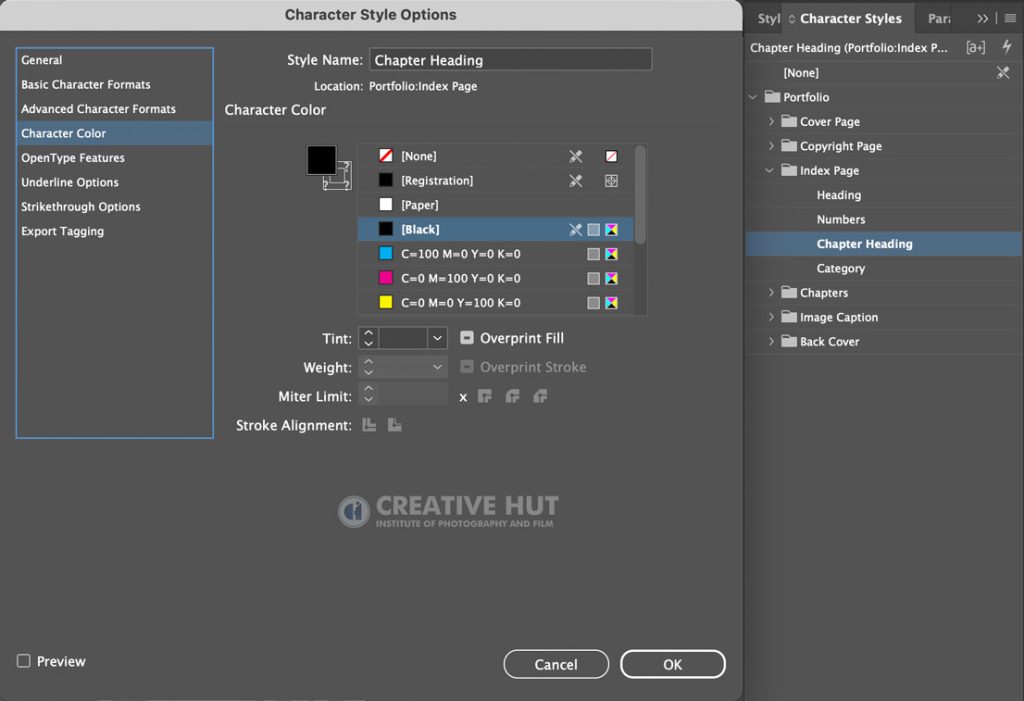
Index Page | Chapter Heading
Font Family – Futura Md BT
Font Style – Bold
Font Size – 11 pt
Font Leading – 16 pt
Character Color – Black
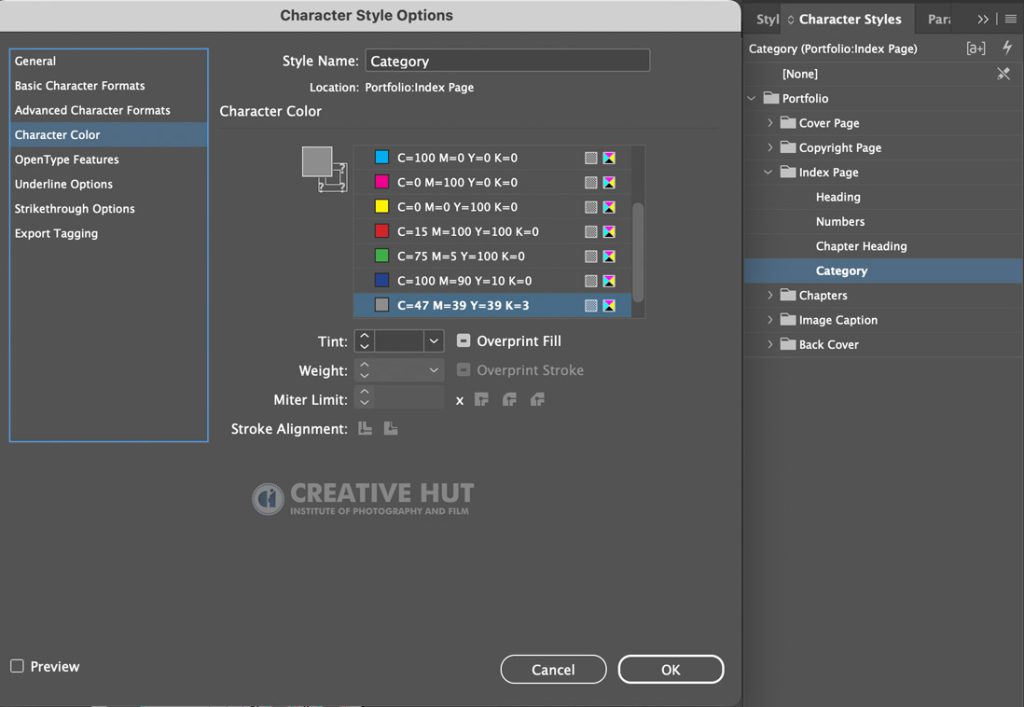
Index Page | Category
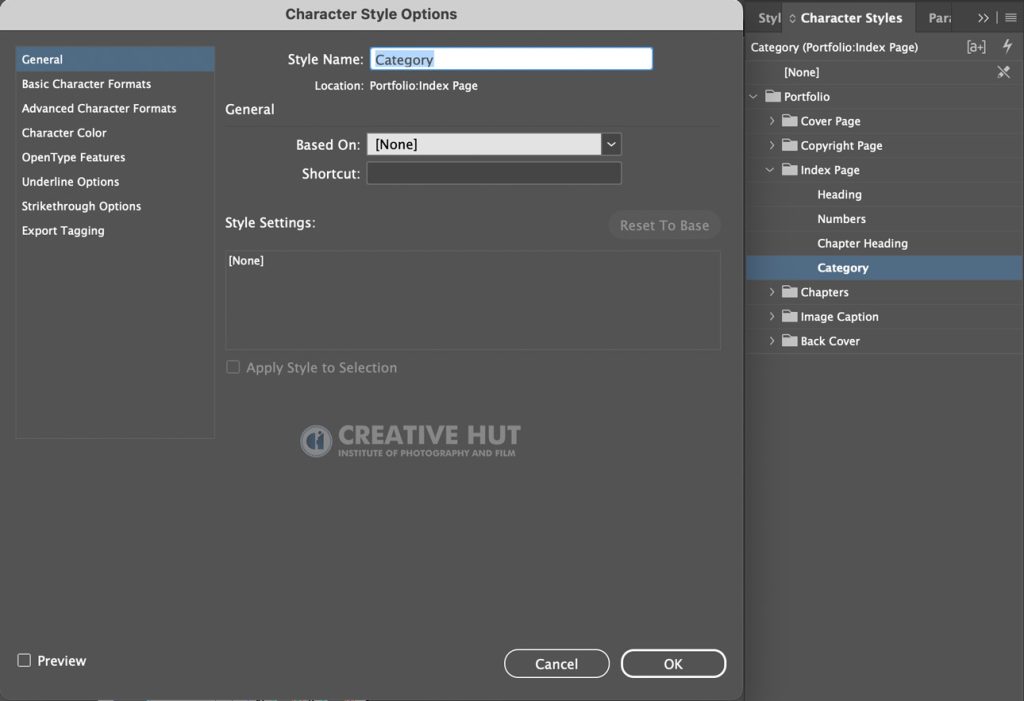
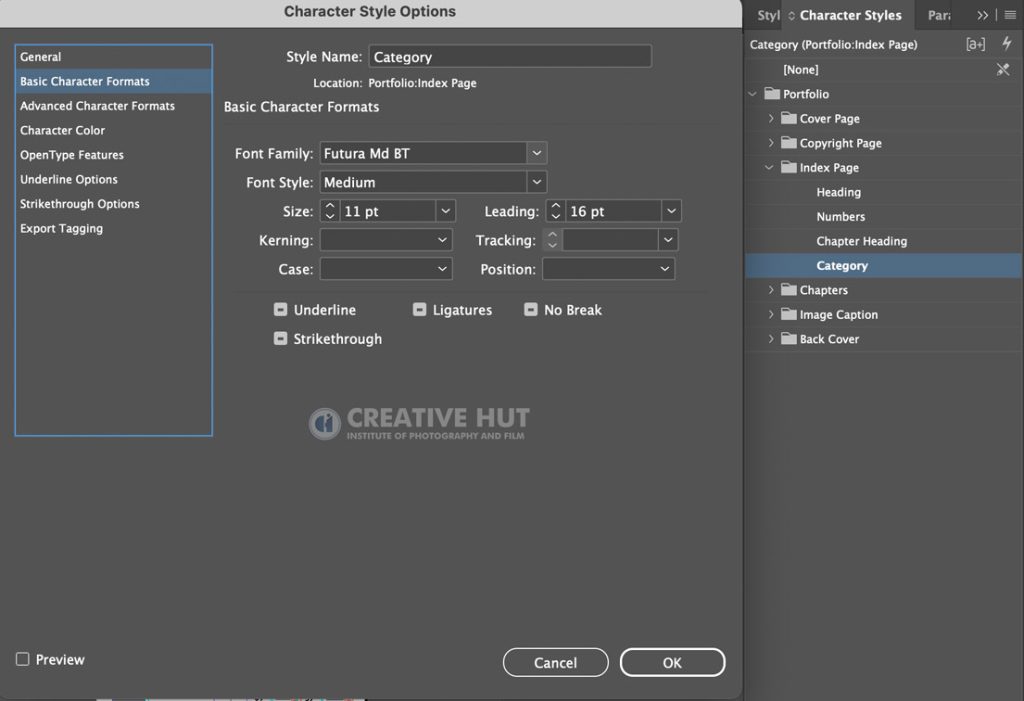
Index Page | Category
Font Family – Futura Md BT
Font Style – Medium
Font Size – 11 pt
Font Leading – 16 pt
Character Color – Grey (C=47 M=39 y = 39 k= 3)
Chapters | Chapter Heading
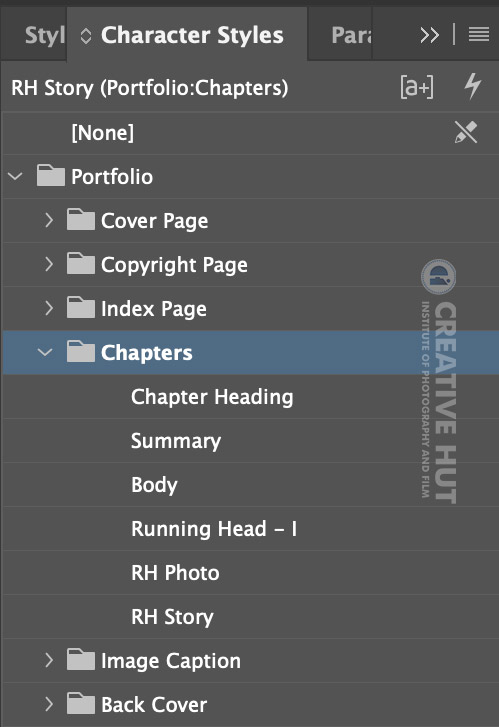
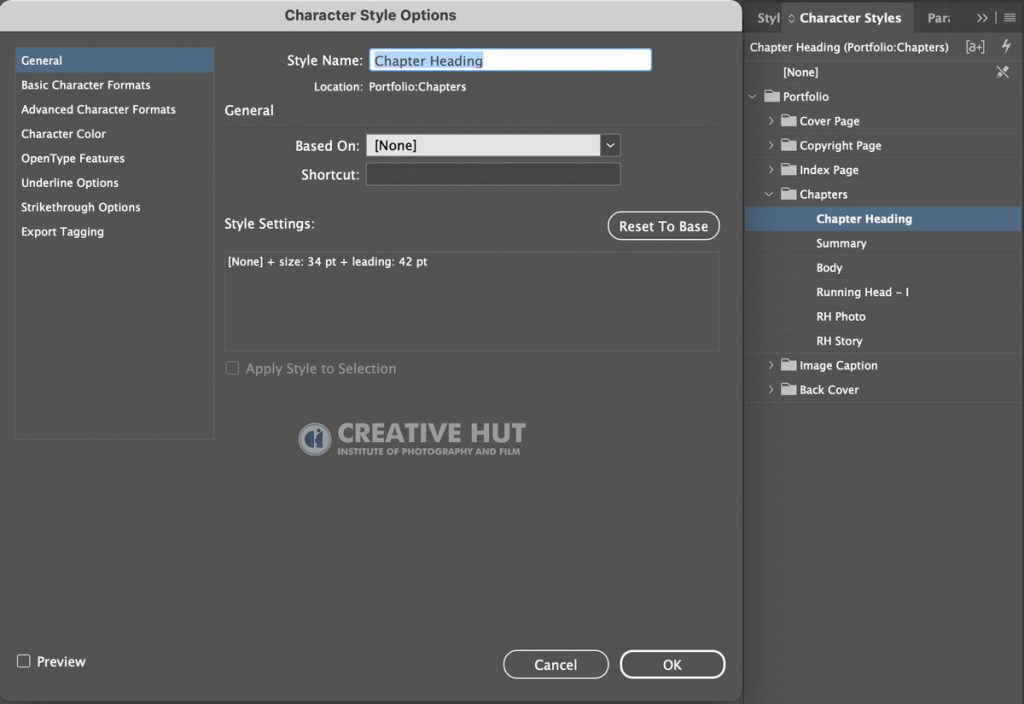
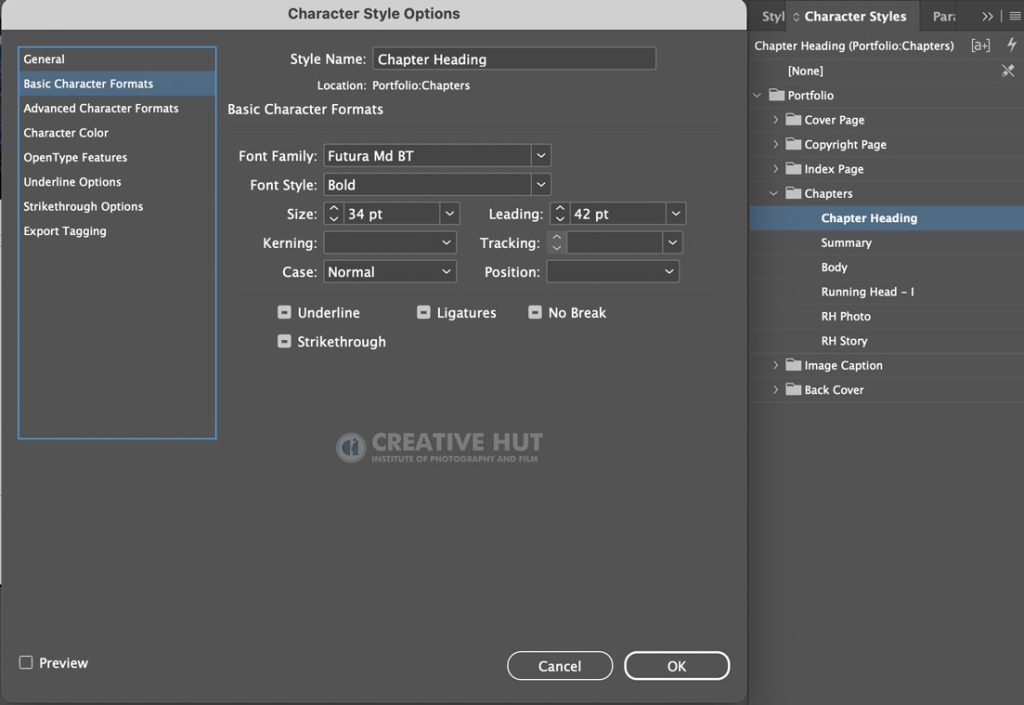
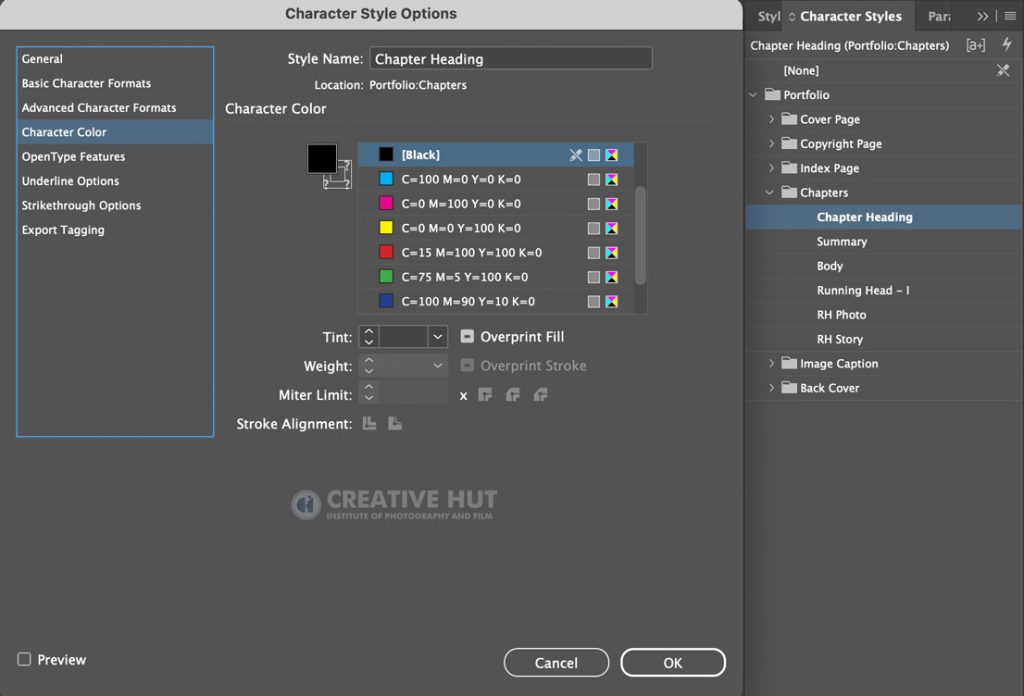
Chapters | Chapter Heading
Font Family – Futura Md BT
Font Style – Bold
Font Size – 34 pt
Font Leading – 42 pt
Character Color – Black
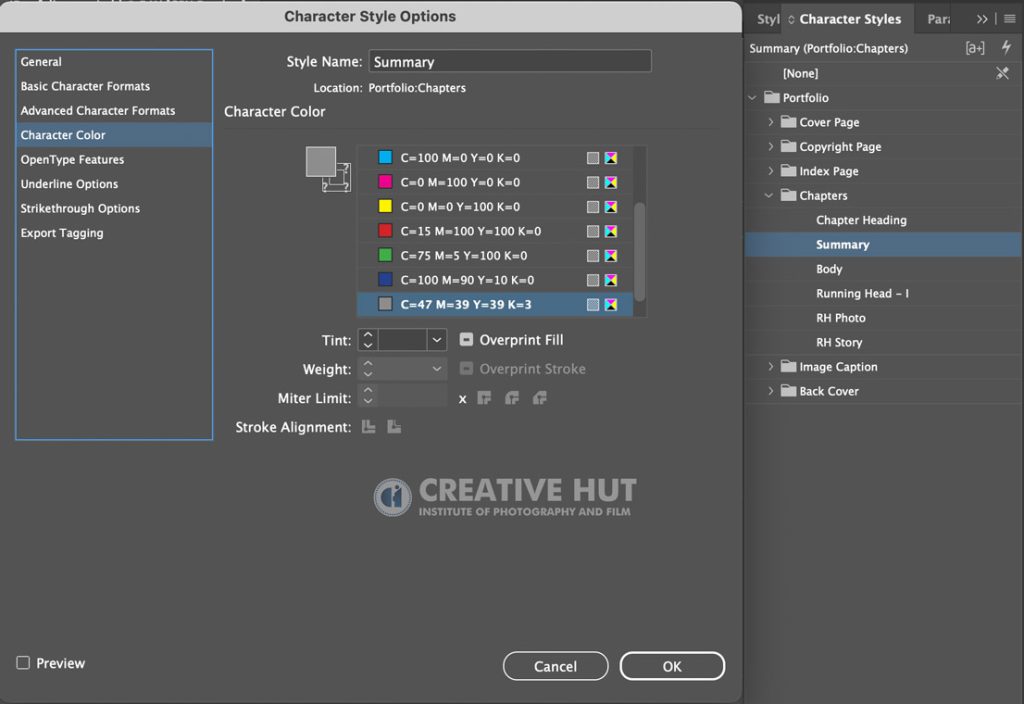
Chapters I Summary
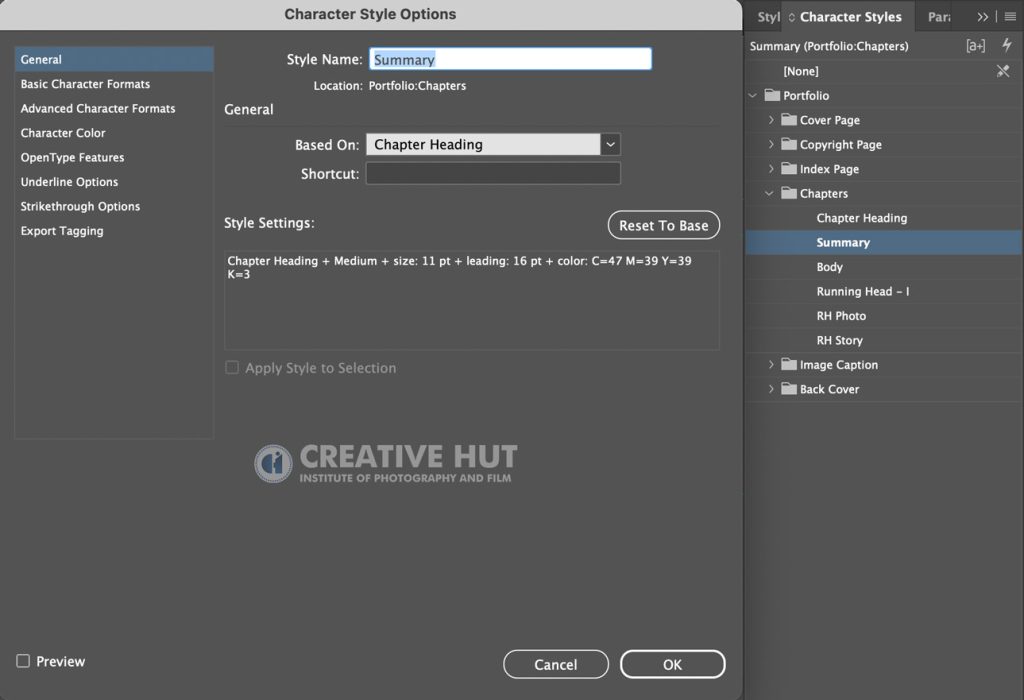
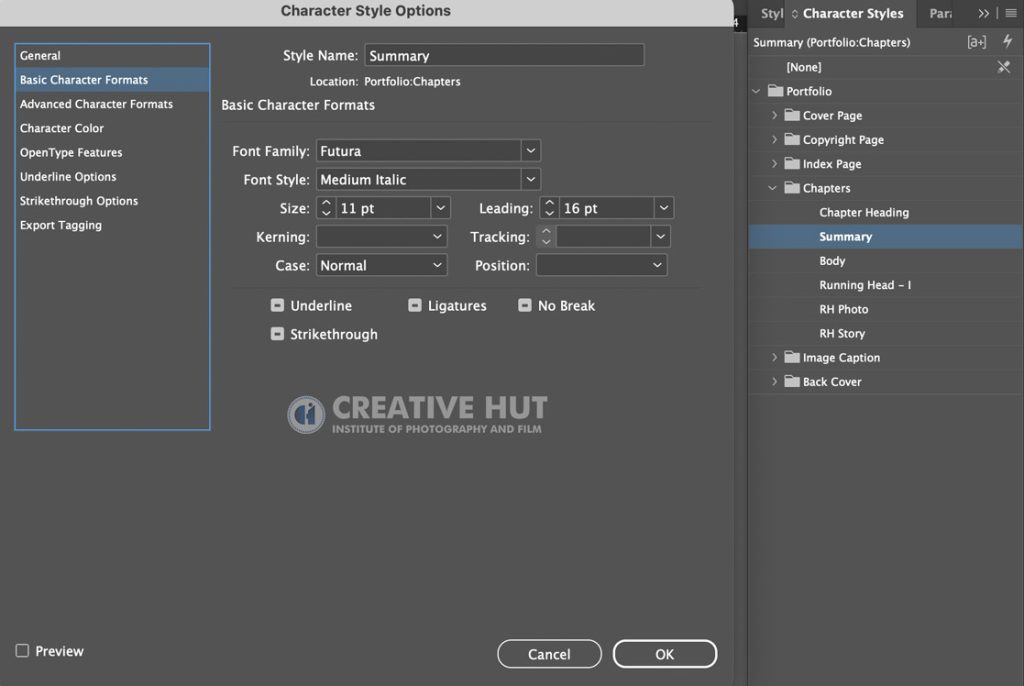
Chapters | Summary
Font Family – Futura
Font Style – Medium Italic
Font Size – 11 pt
Font Leading – 16 pt
Character Color – Grey (C=47 M=39 y = 39 k= 3)
Chapters – Body
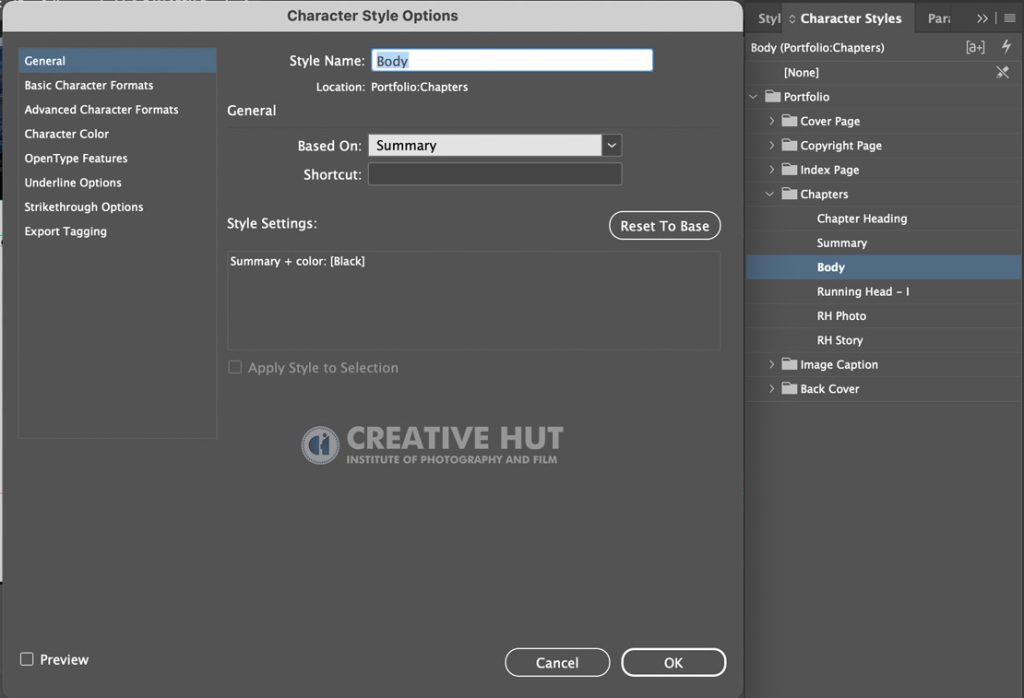
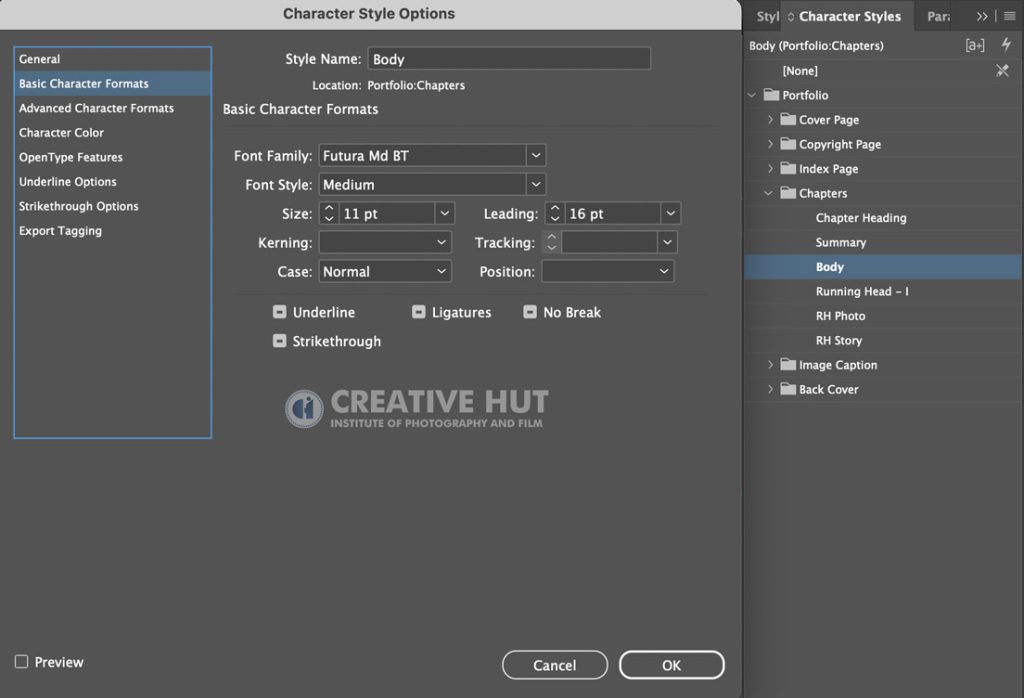
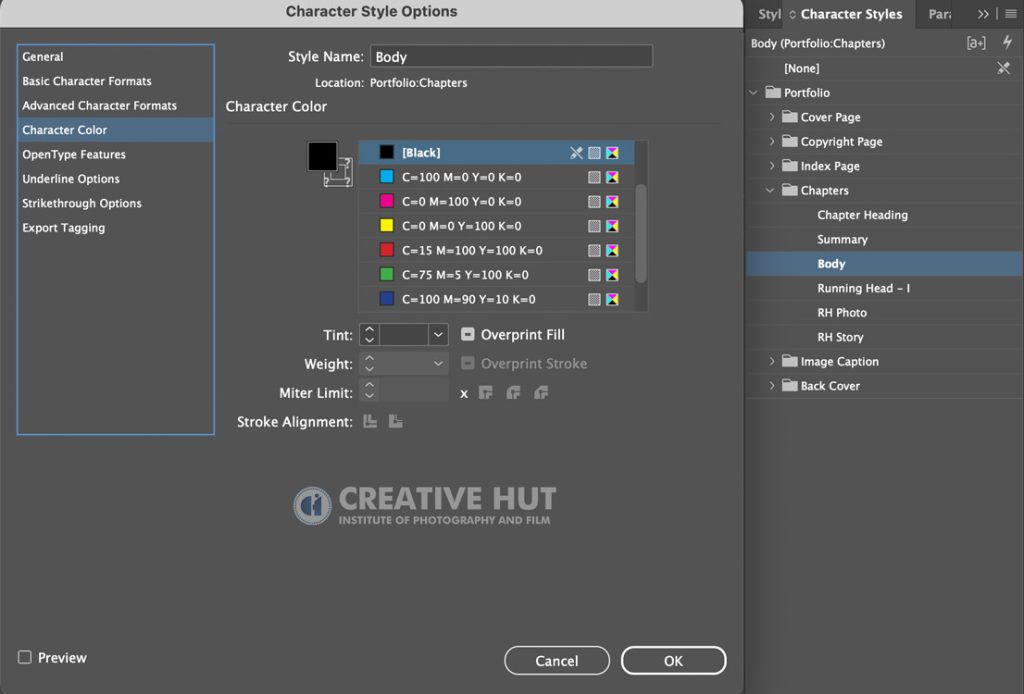
Chapters | Body
Font Family – Futura Md BT
Font Style – Medium
Font Size – 11 pt
Font Leading – 16 pt
Character Color – Black
Chapters – Running Head – I
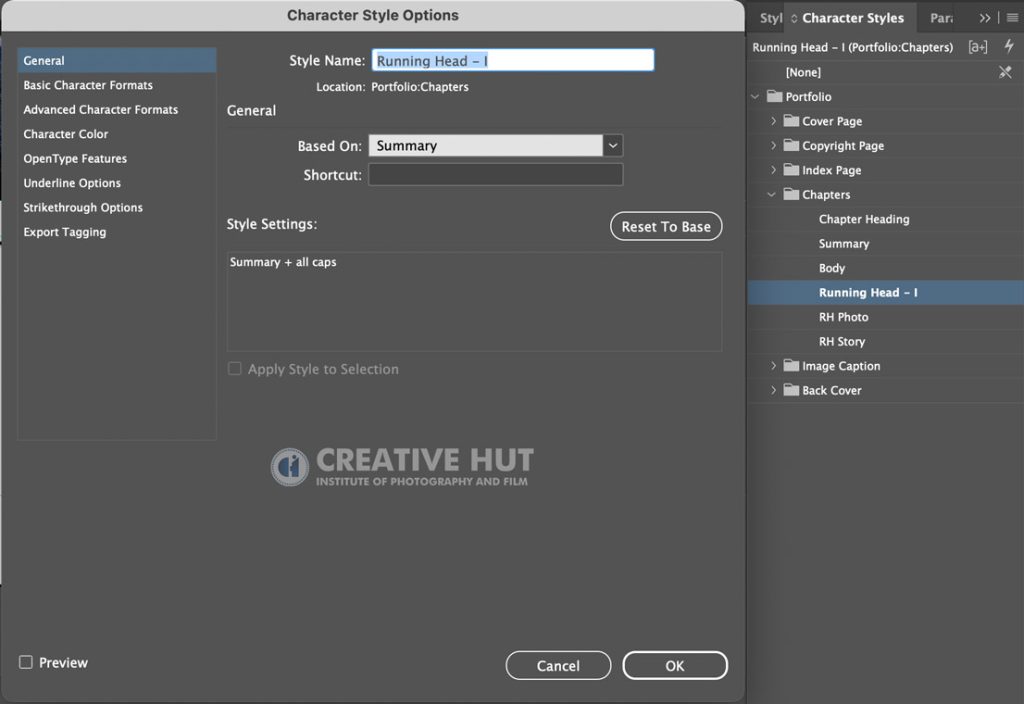
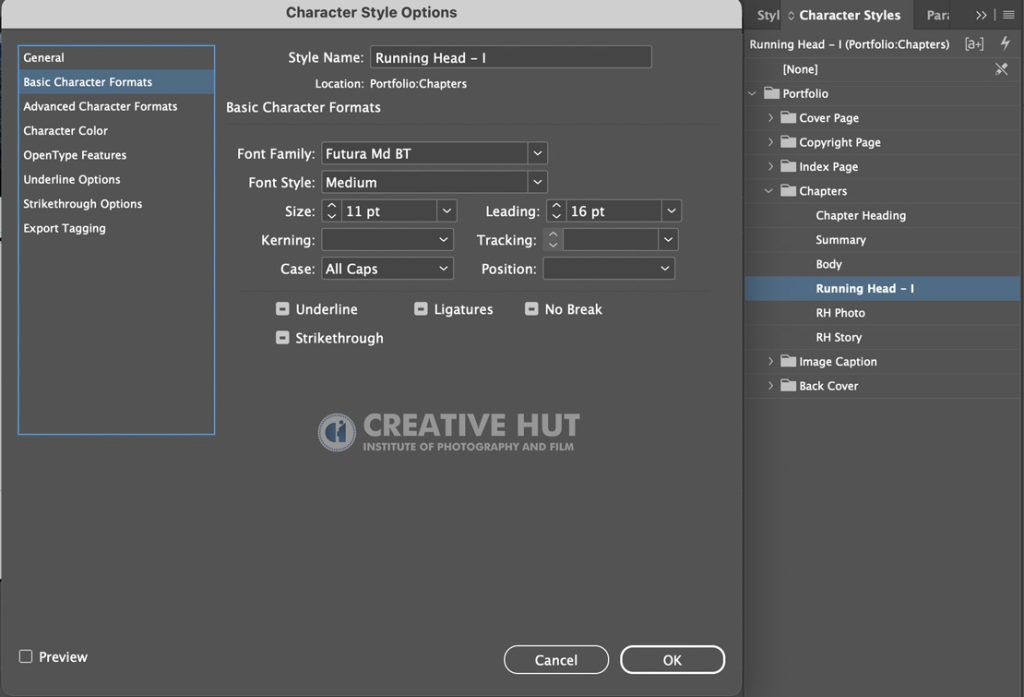
Chapters | Running Head I Font Family – Futura Md BT
Font Style – Medium
Font Size – 11 pt
Font Leading – 16 pt
Case – All Caps
Character Color – Grey (C=47 M=39 y = 39 k= 3)
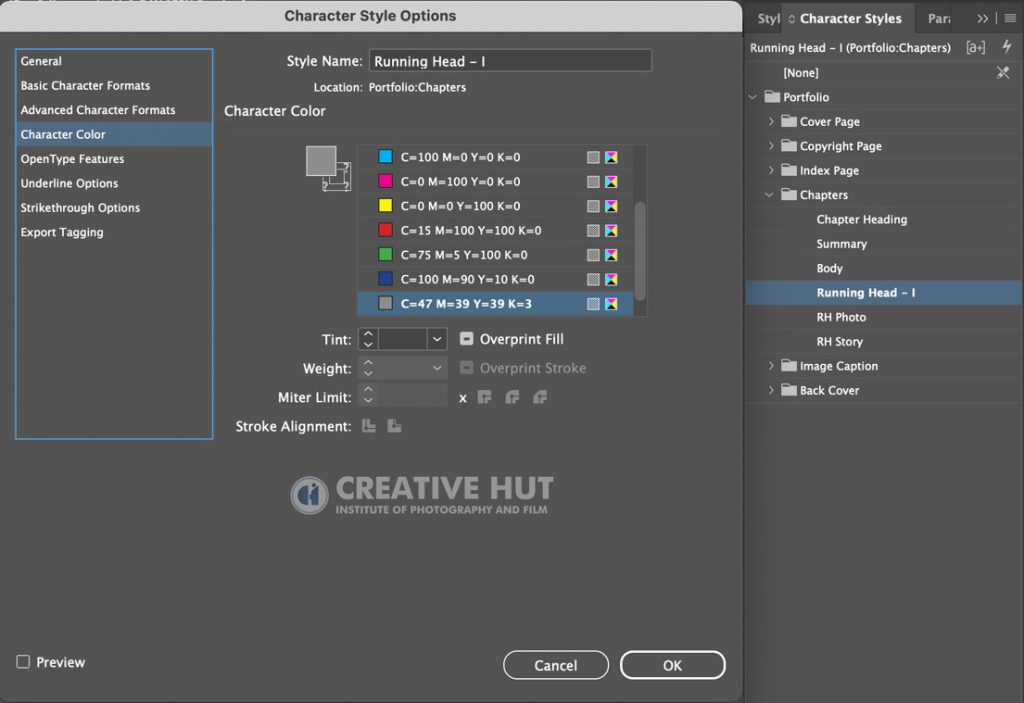
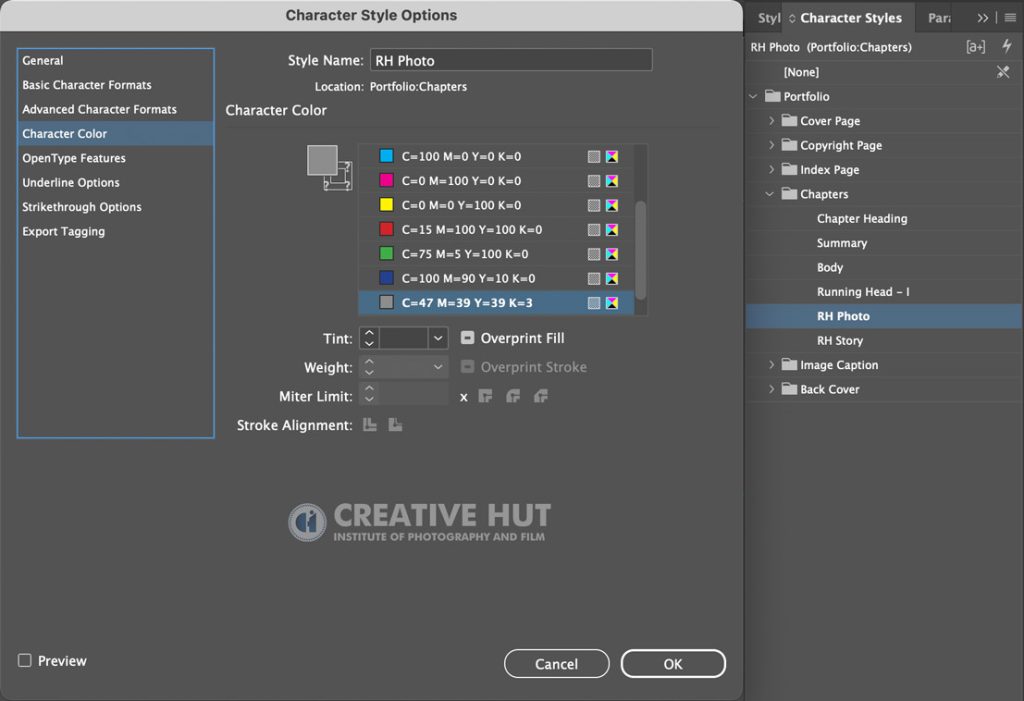
Chapters – R H Photo
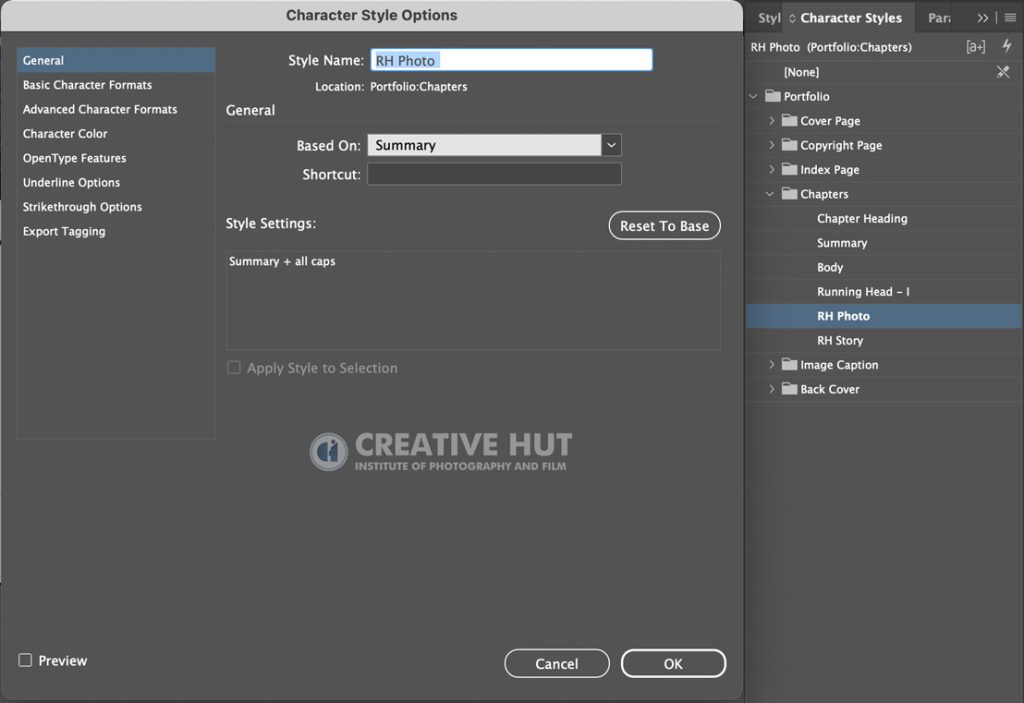
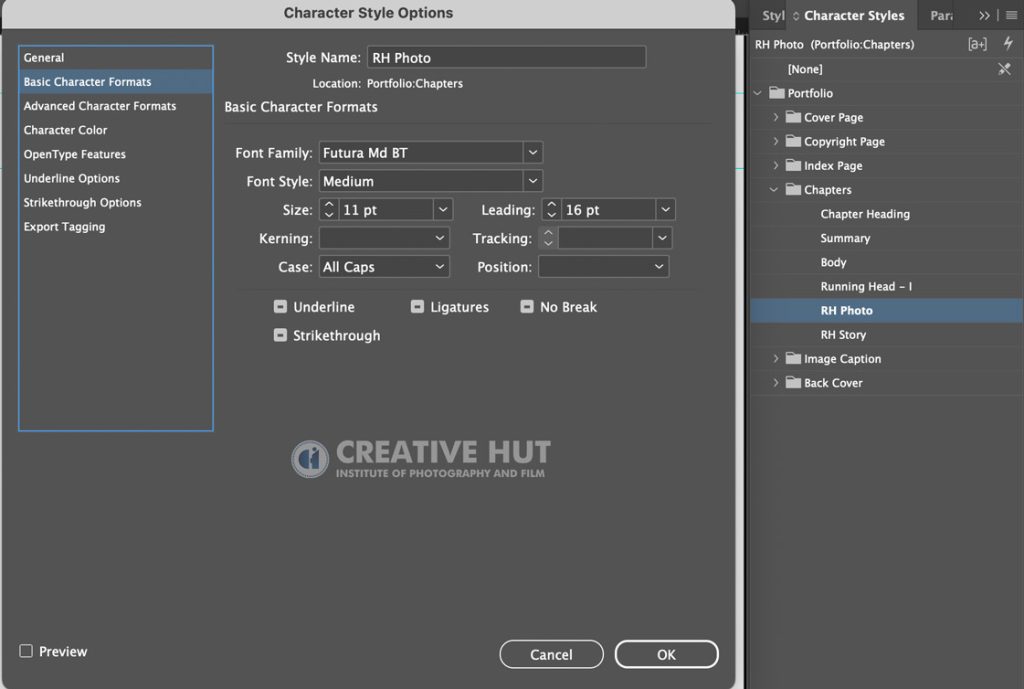
Chapters | Running Head I Font Family – Futura Md BT
Font Style – Medium
Font Size – 11 pt
Font Leading – 16 pt
Case – All Caps
Character Color – Grey (C=47 M=39 y = 39 k= 3)
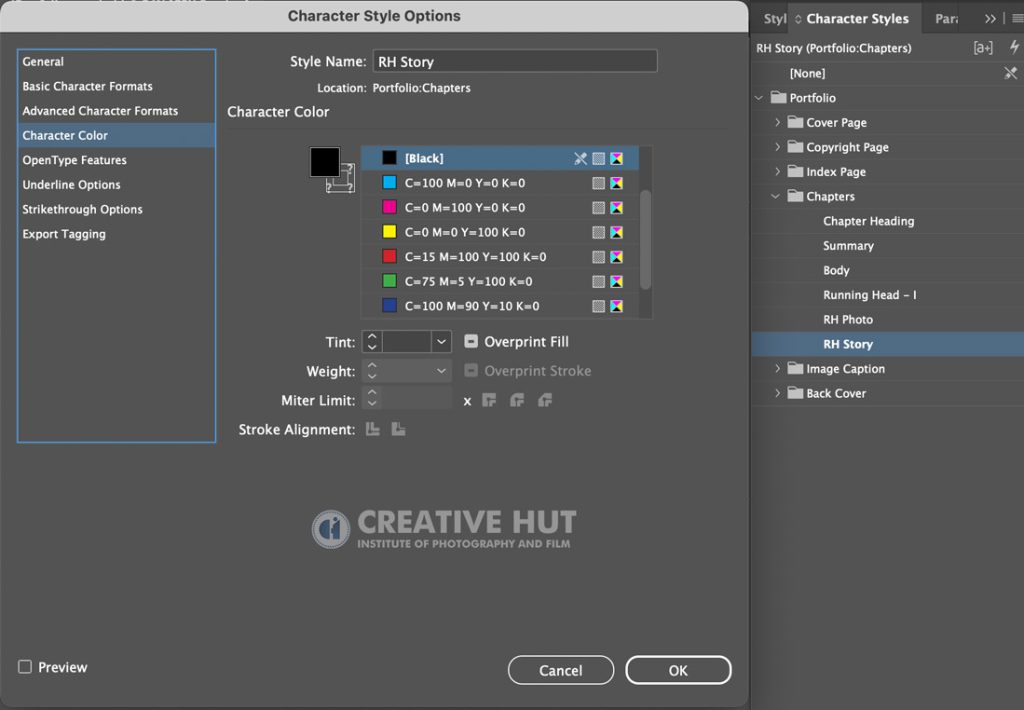
Chapters – R H Story
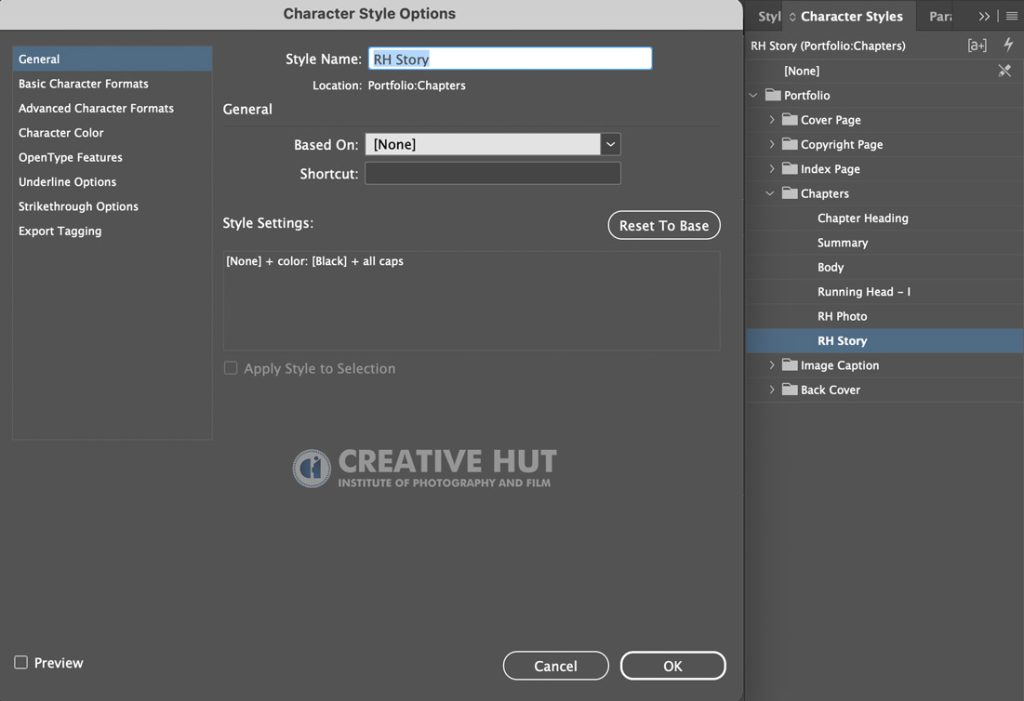
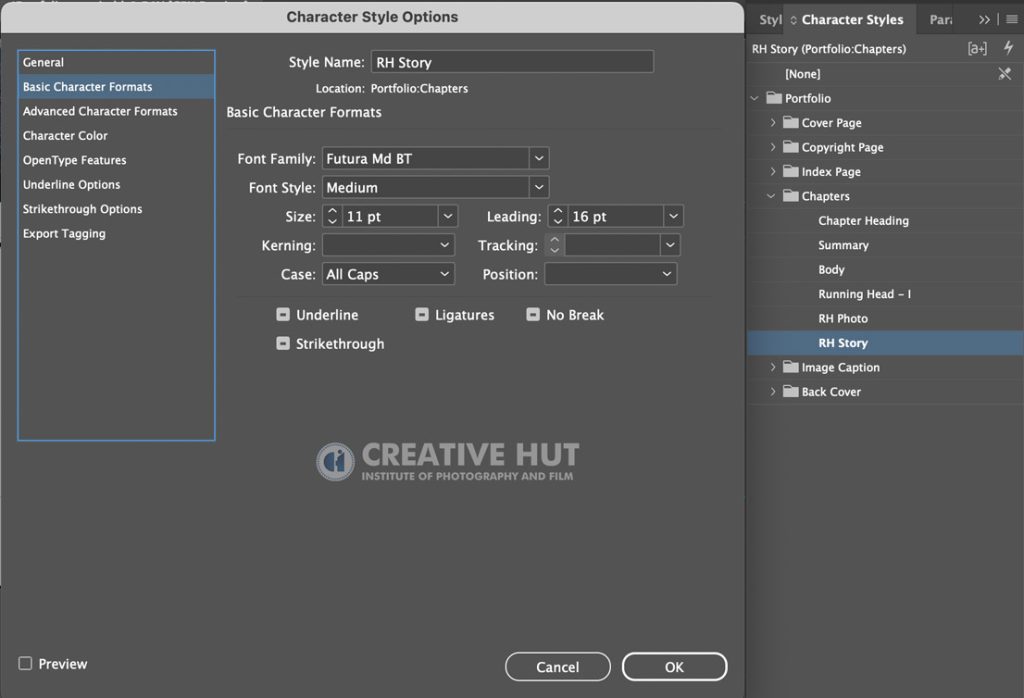
Chapters | RH Story Font Family – Futura Md BT
Font Style – Medium
Font Size – 11 pt
Font Leading – 16 pt
Case – All Caps
Character Color – Black
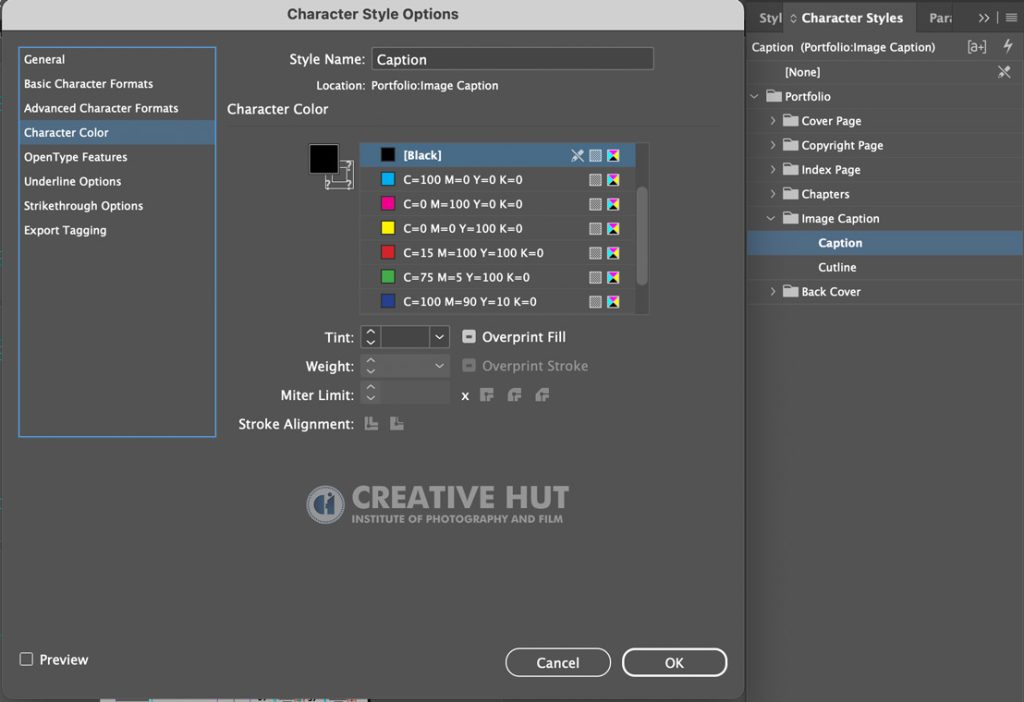
Chapters – Caption
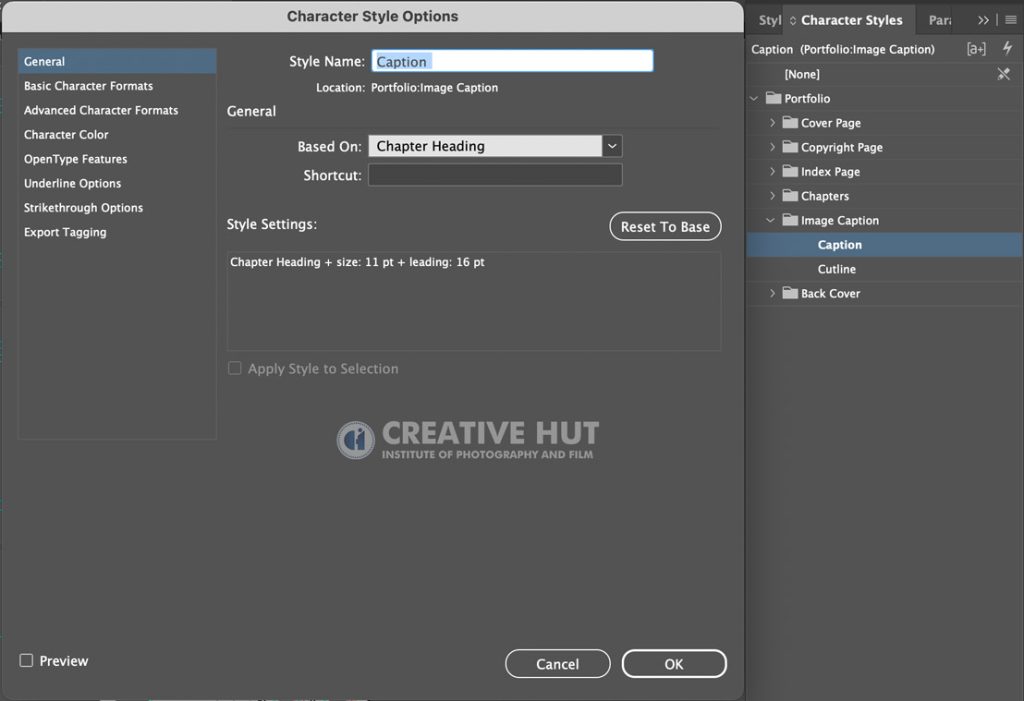
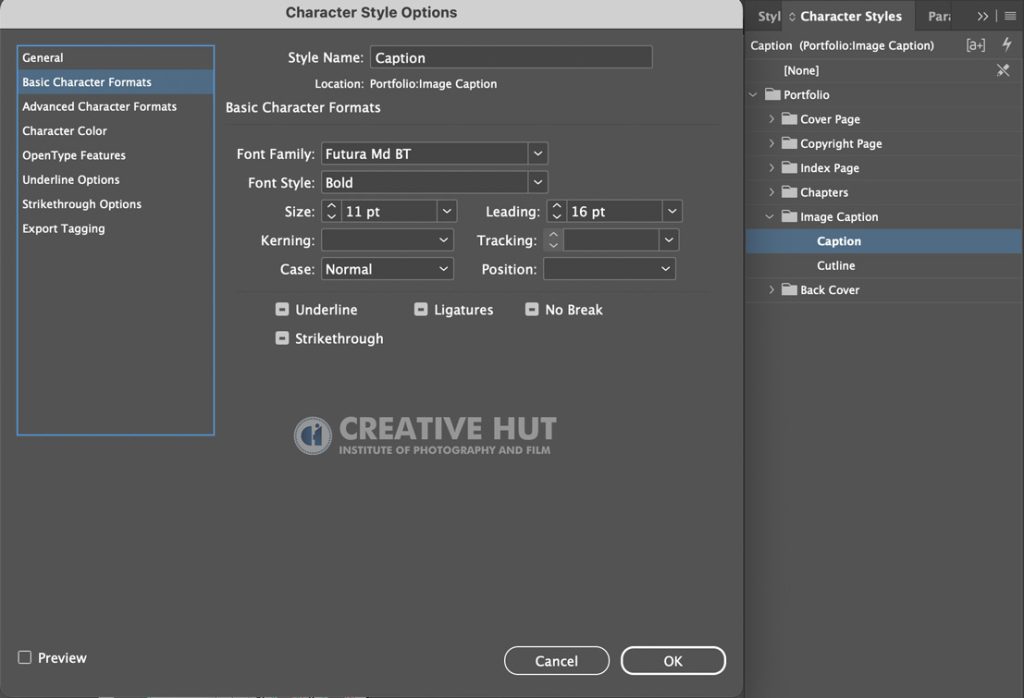
Chapters – Caption Font Family – Futura Md BT
Font Style – Bold
Font Size – 11 pt
Font Leading – 16 pt
Case – Normal
Character Color – Black
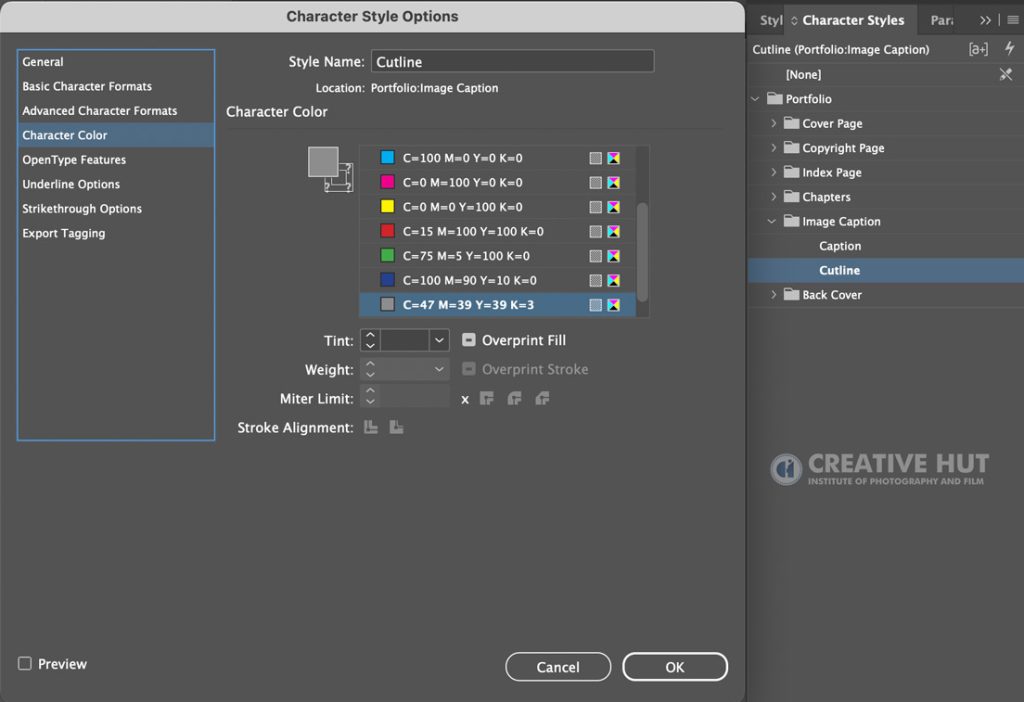
Chapters – Cutline
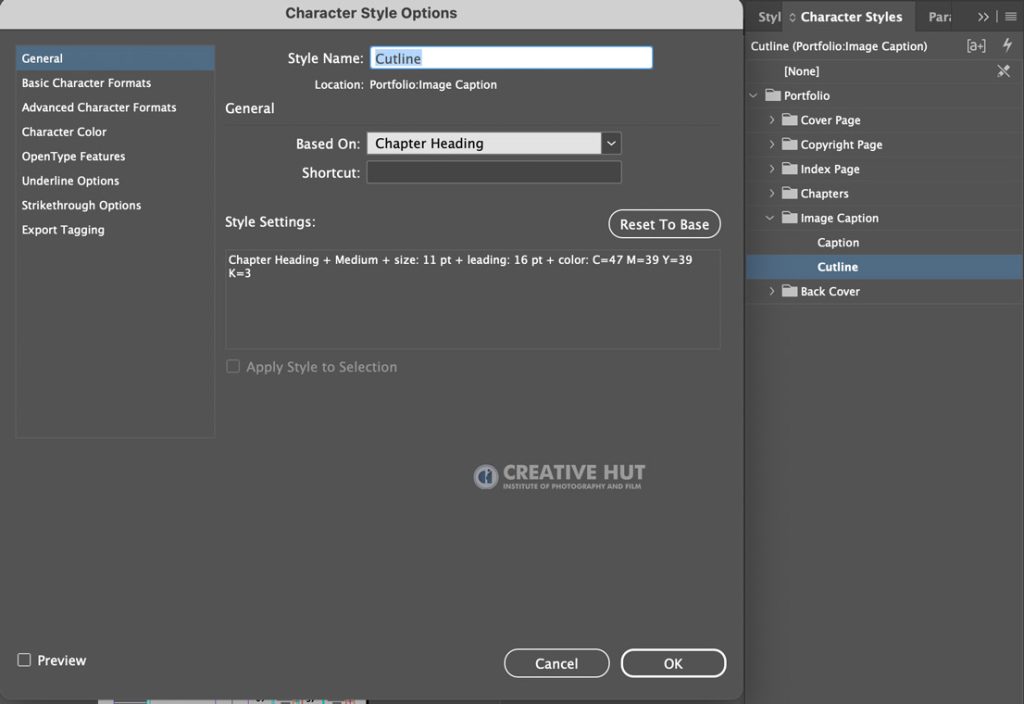
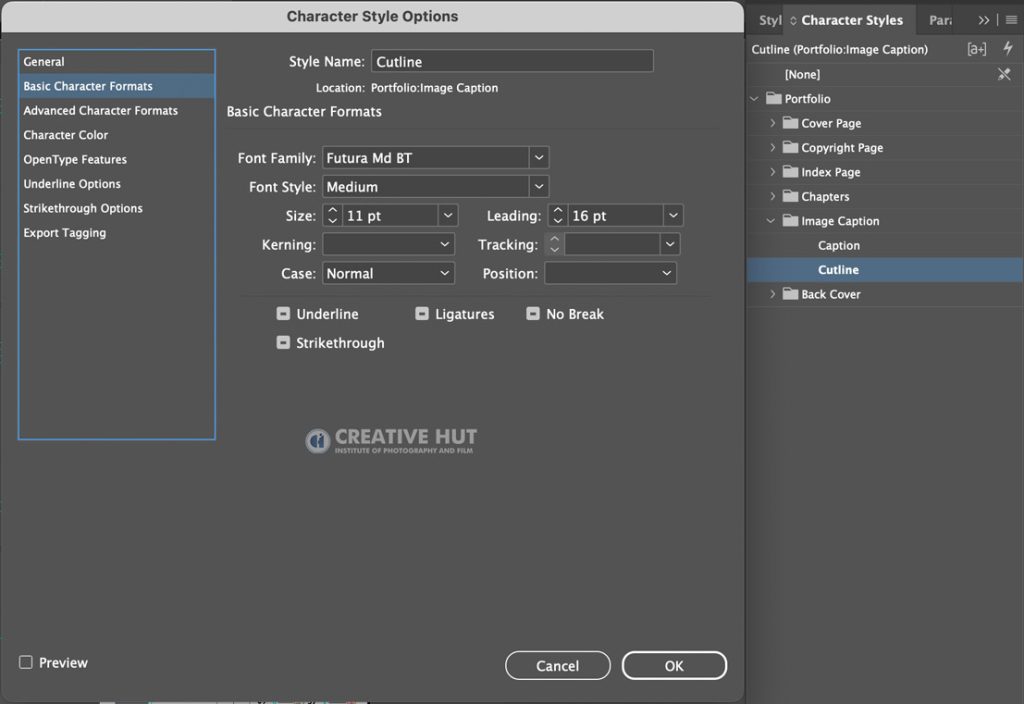
Chapters | Cutline Font Family – Futura Md BT
Font Style – Medium
Font Size – 11 pt
Font Leading – 16 pt
Case – All Caps
Character Color – Black
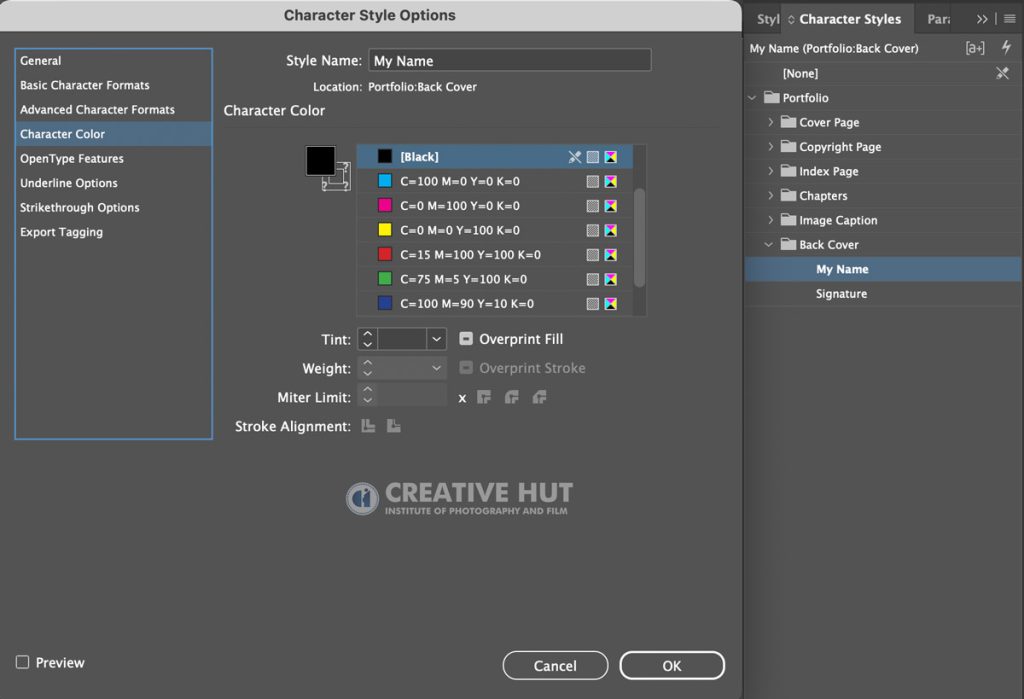
Back Cover Page | My Name
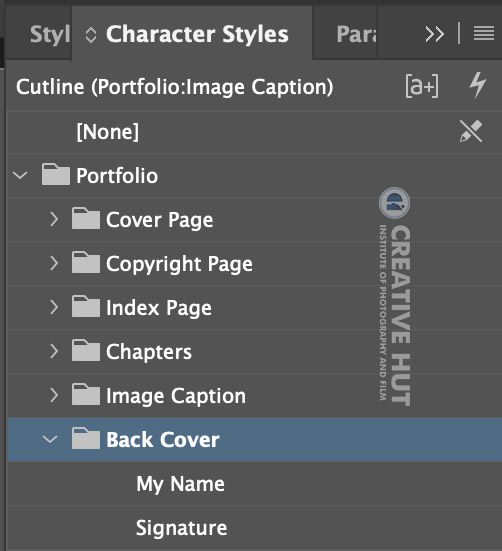
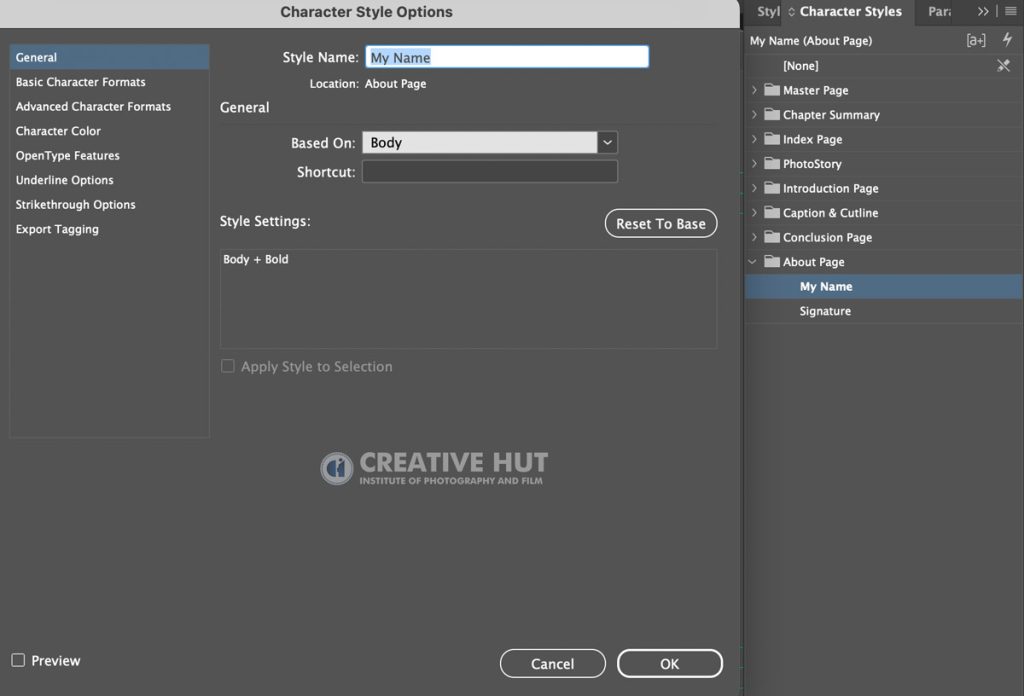
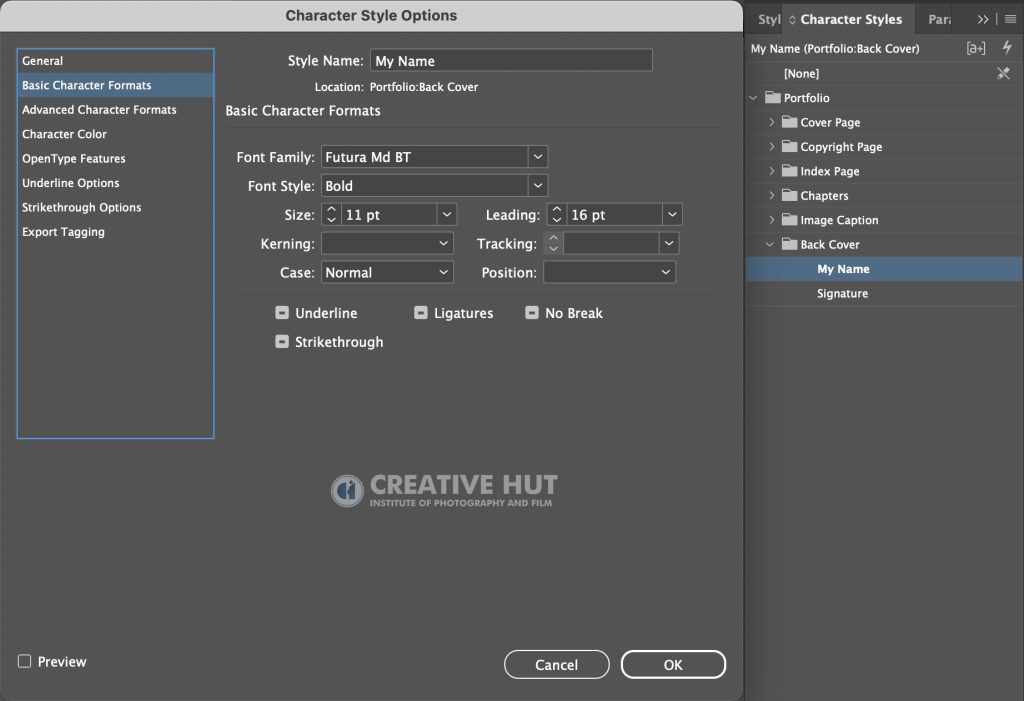
Back Cover |My Name Font Family – Futura Md BT
Font Style – Bold
Font Size – 11 pt
Font Leading – 16 pt
Case – Normal
Character Color – Black
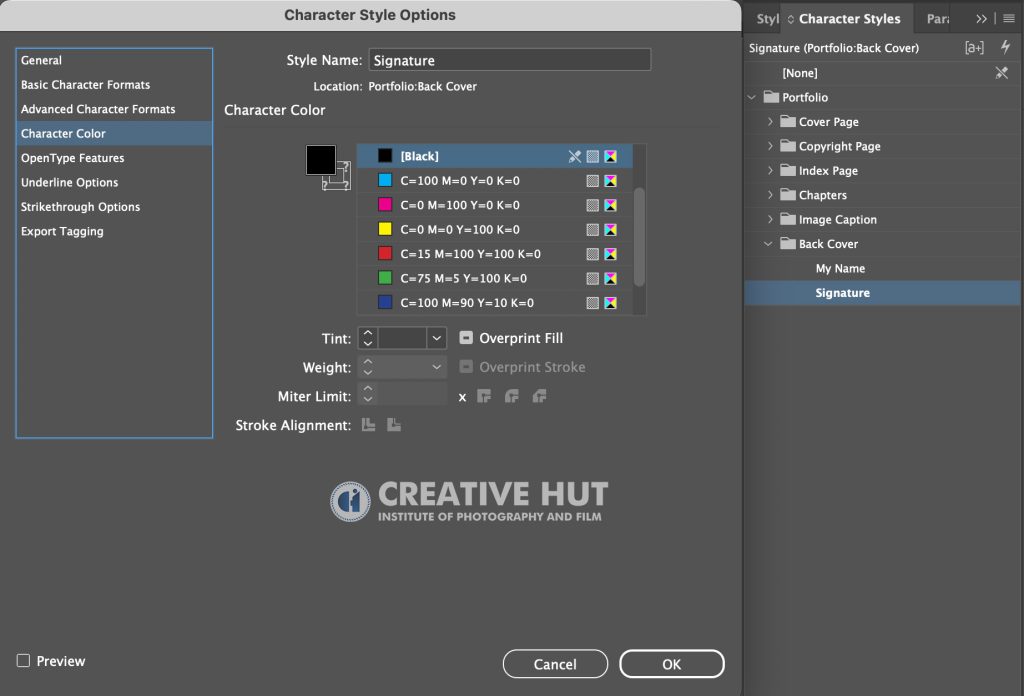
Back Cover Page | Signature
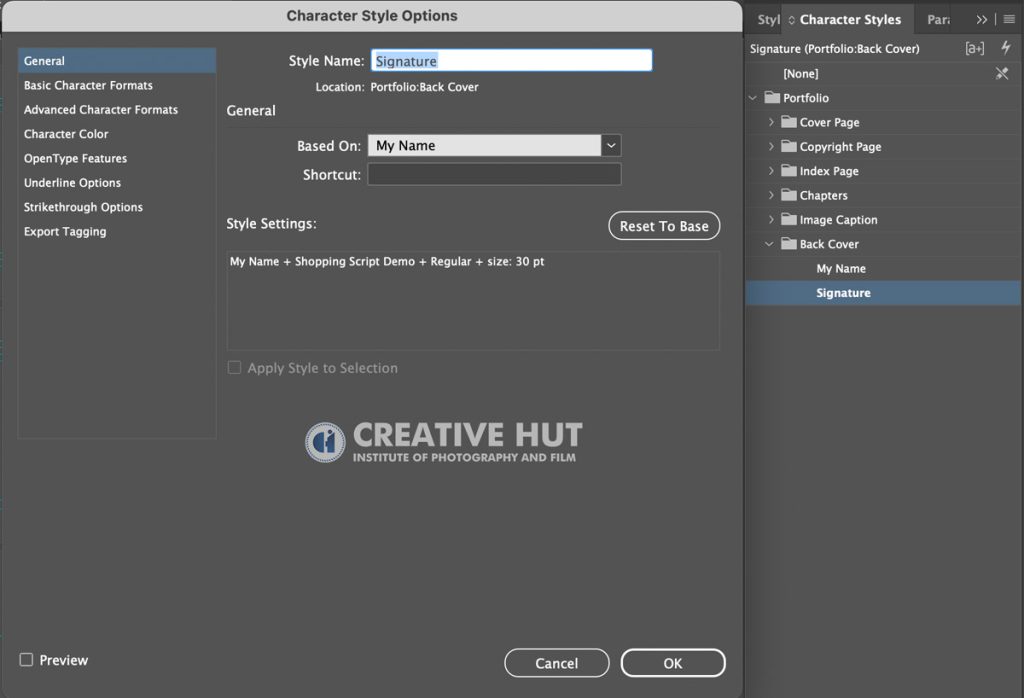
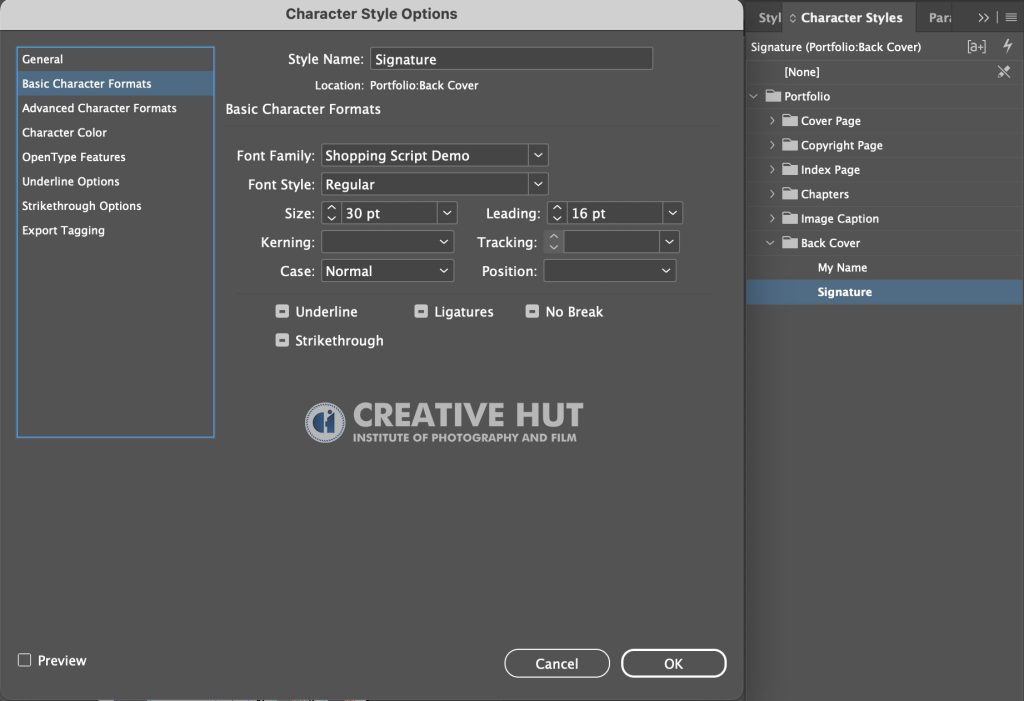
Backcover | Signature
Font Family – Bastliga One
Font Style – Regular
Font Size – 30 pt
Font Leading – 16 pt
Case – Normal
Character Color – Black
Fonts to download – Download
Paragraph Styles
Summary

General
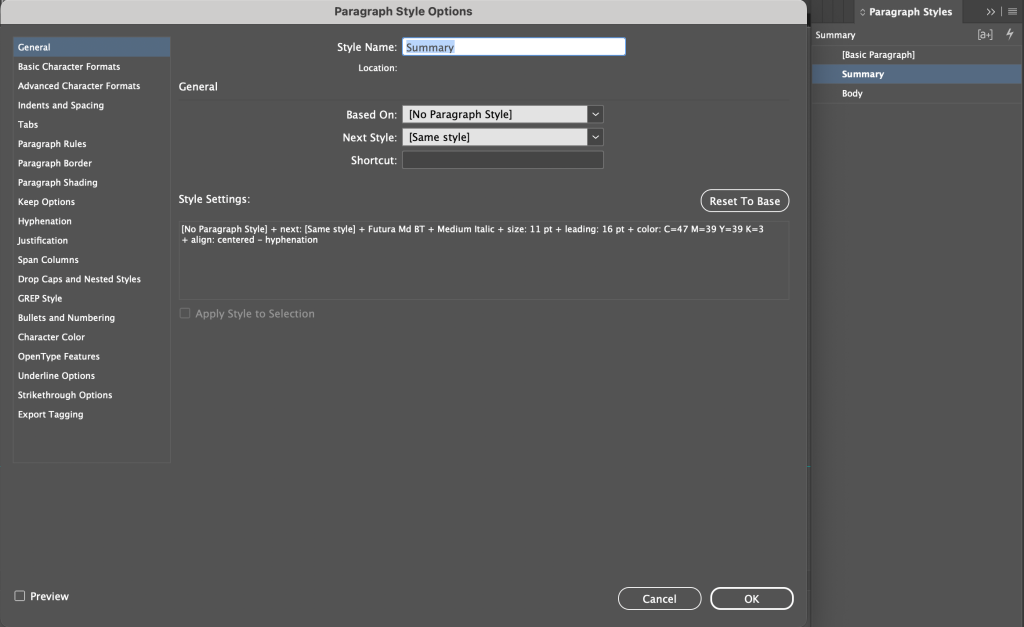
Style Name: Summary
Basic Character Formats
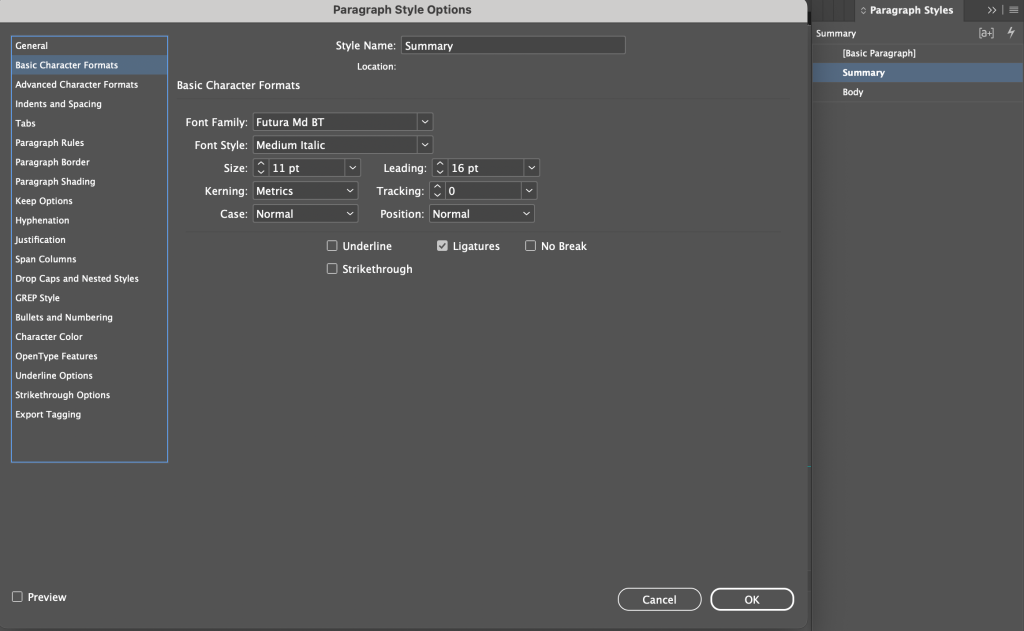
Font Family: Futura Md BT
Font Style: Medium Italic
Size 11pt
Leading: 16pt
Indents and spacing
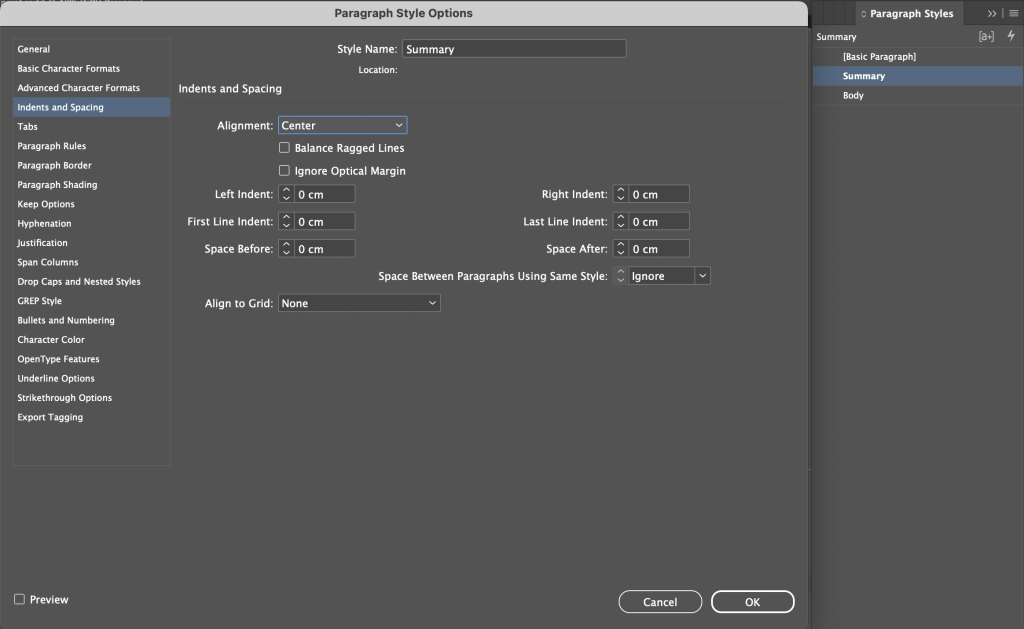
Alignment: Center
Hyphenation
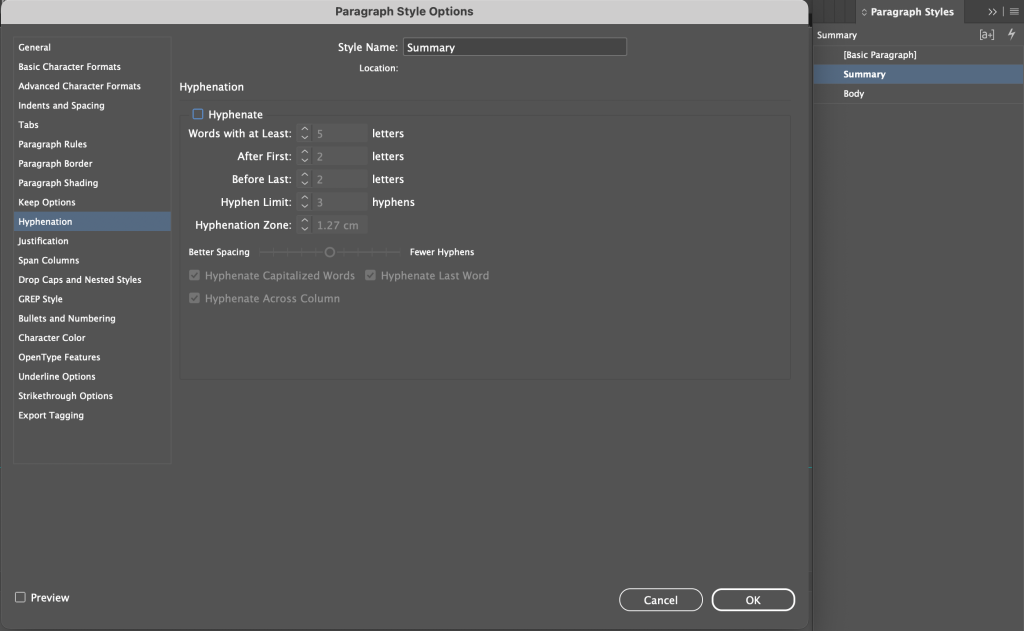
Hyphenate OFF
Justification
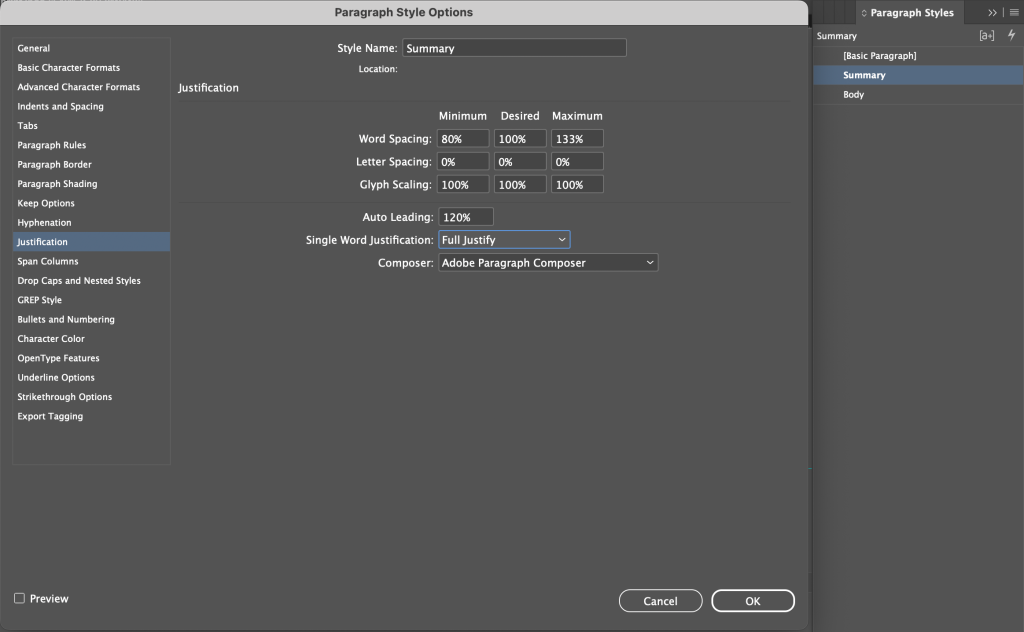
Word Spacing: Minimum – 80% | Desired – 100% | Maximum – 133%
Letter Spacing: Minimum – 0% | Desired – 0% | Maximum – 0%
Glyph Scaling: Minimum – 100% | Desired – 100% | Maximum – 100%
Auto Leading: 120%
Single Word Justification: Full Justify
Character Color
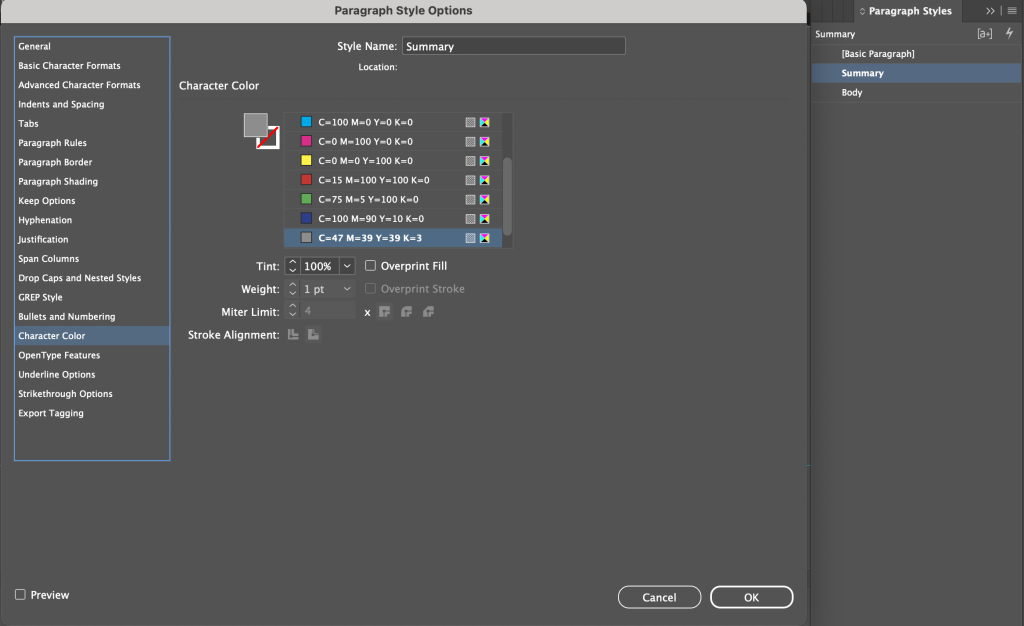
C=47 M=39 Y=39 K=3
How to do the Folder Photography Portfolio?
1.Book
1a. InDesign File (Portfolio File, Front and Back Cover File)
1b. Book Jpg (Resolution 300 Printing Quality)
1c. Book Pdf (Less than 2MB only)
1d. Book Content (Full content of word format from Introduction page to Conclusion page and at the end – About page (I perspective)
2. Images
2aa. Original
2ab. PSD (Layers without merging and foldering should be properly done)
2ac. Edited JPG
2ad. Website (Put all resized images (100kb) of this chapter and content in word format / Rename according caption-name-place-creative-hut
2b. About
2ba. About (word format of About in 3rd person point of view)
2bb. Resume PSD
2bc. Resume PDF (Quality 500KB Below)
2bd. Personal Photo (100 KB, Full Quality)
How to do the Foldering of Cinematography Portfolio?
1. Video
Exported video and Thumb image.
2. Script
Story, Scene division, Biography, Location Details, Screenplay – Docs, Indesign
3. Short Division
Excel and Pdf


